Flame On

Today we’ll be looking at how I created a flame thrower prop. In the wasteland, a good flamer thrower is an invaluable weapon against the horde, but proper flame throwers are hard to come by. But fear not, with a little Macgyvering you can build your own!

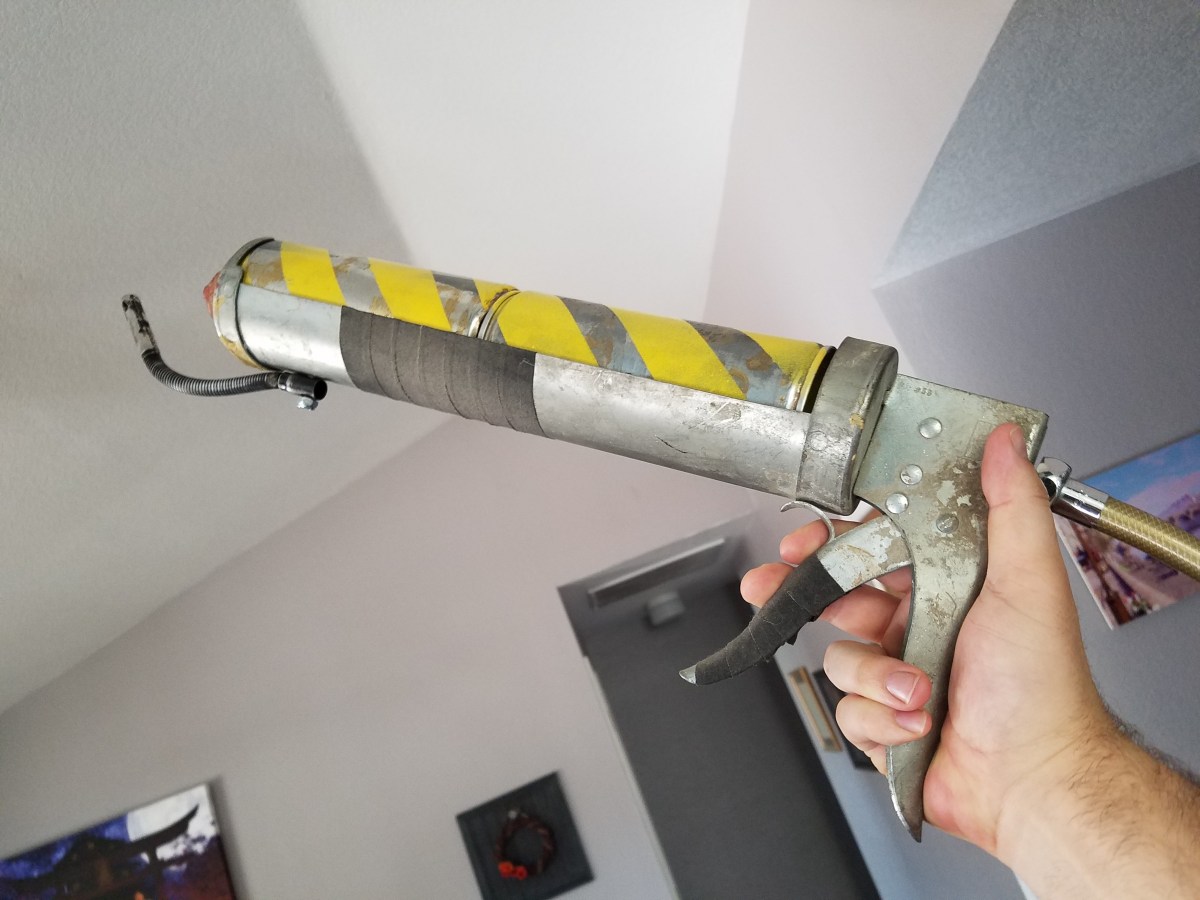
While I was perusing a local thrift store, I came across a larger than average caulking gun. It looked pretty old and beat up, and metal. It was a good starting place.

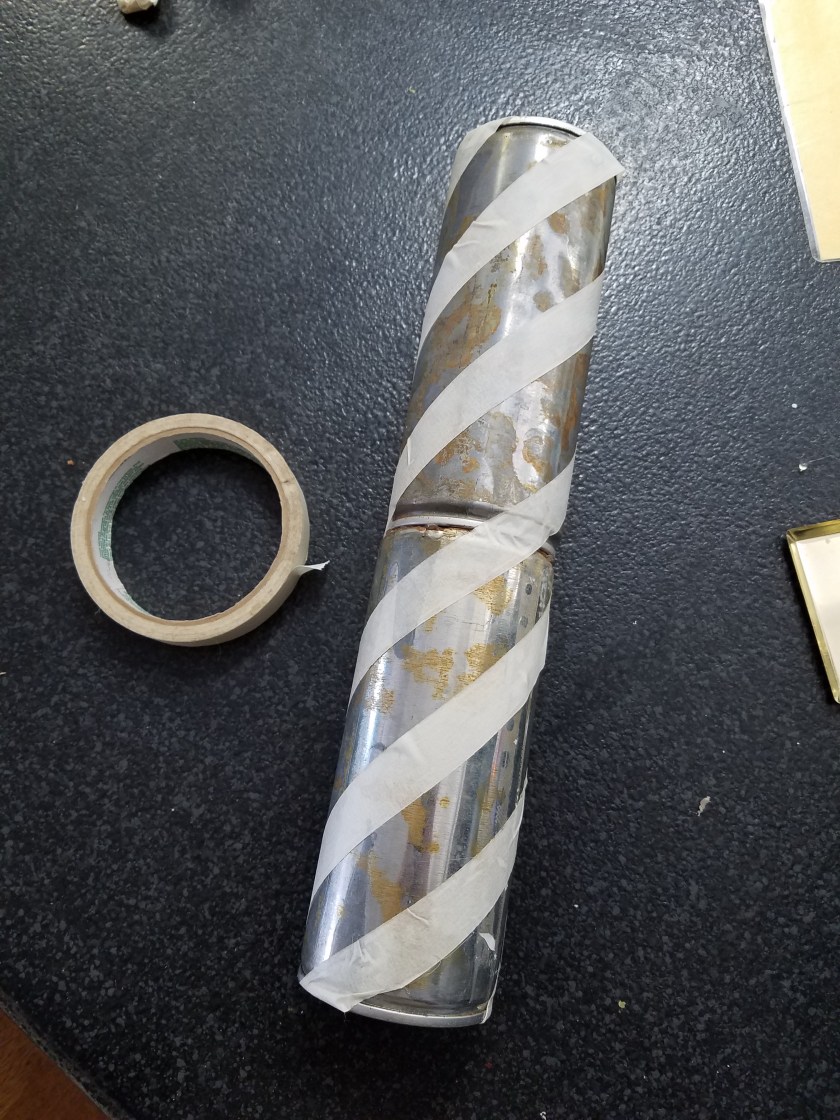
To fill the trough, I needed something that would fit snug and look like it could hold the pressurized fuel. I had a bunch of empty spray paint cans lying around, and they fit snug as a bug. First step was cutting off the top of one. I made sure it was super extra empty so I didn’t get a nasty surprise when I cut into it. 20171011_221906

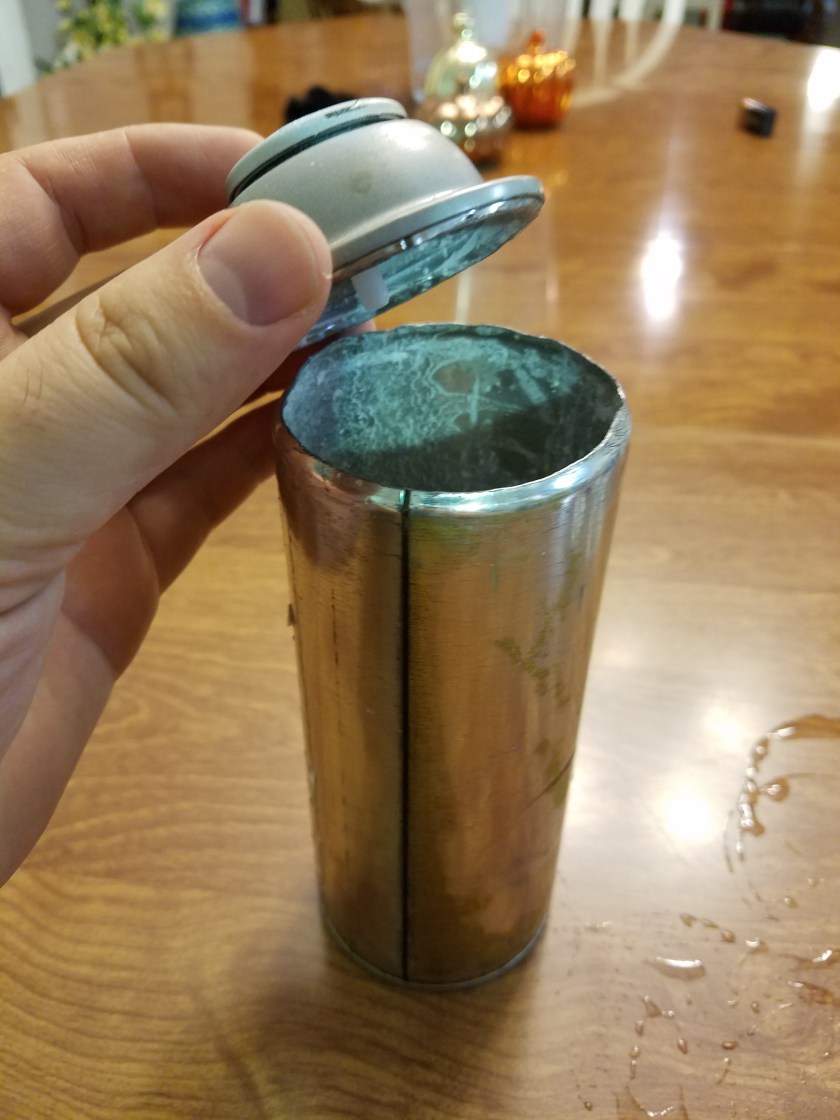
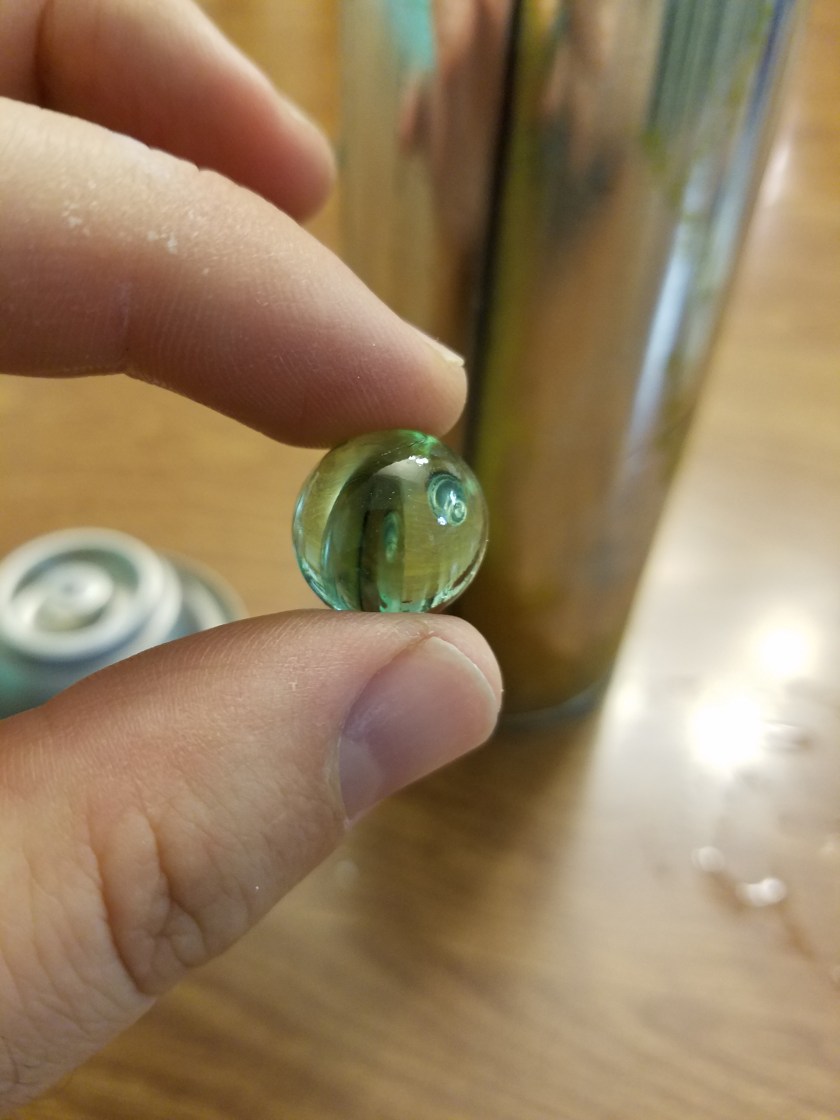
Have you ever wondered what that thing rattling around inside a spray paint can is? Turns out, it’s a marble! When knew?

20171011_221920

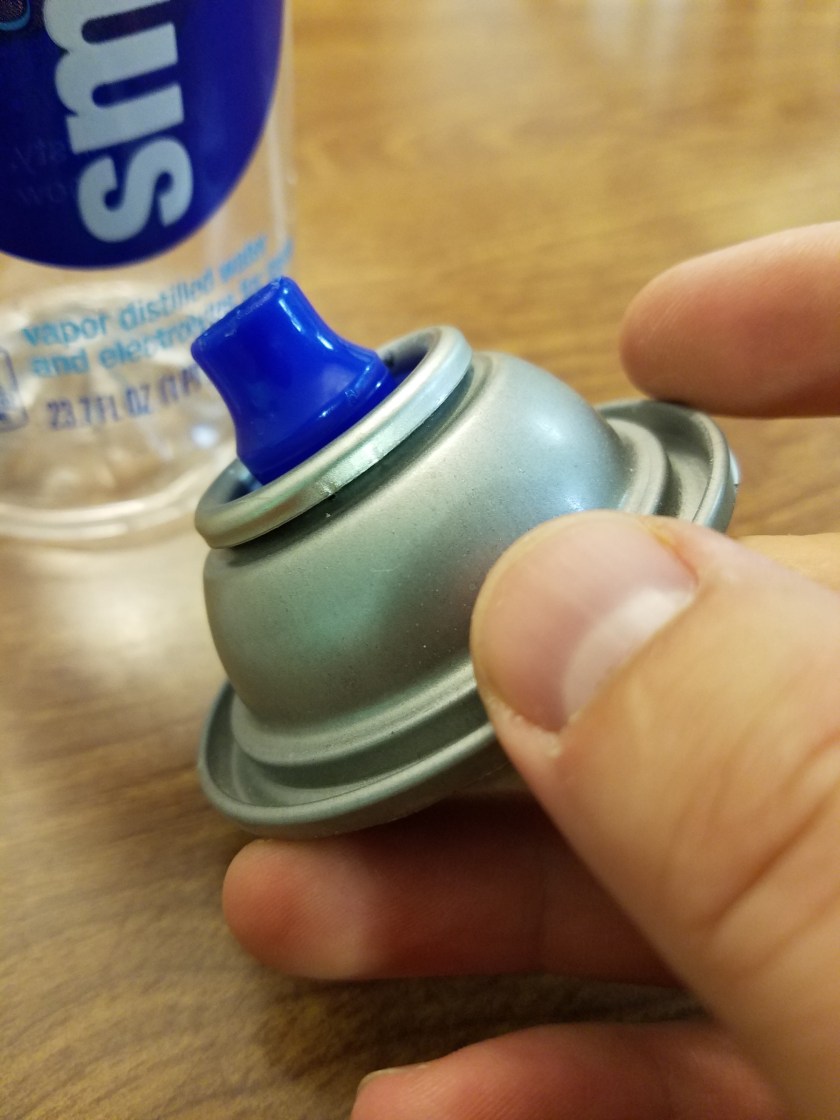
I cut the top off for 2 reasons. One was so that two cans could fit together, and two was to be able to use the top as the end of the flame thrower. I needed a nozzle for the end, and I happened to have a smart water bottle lying around, and I like the look of the tip.

20171011_221937

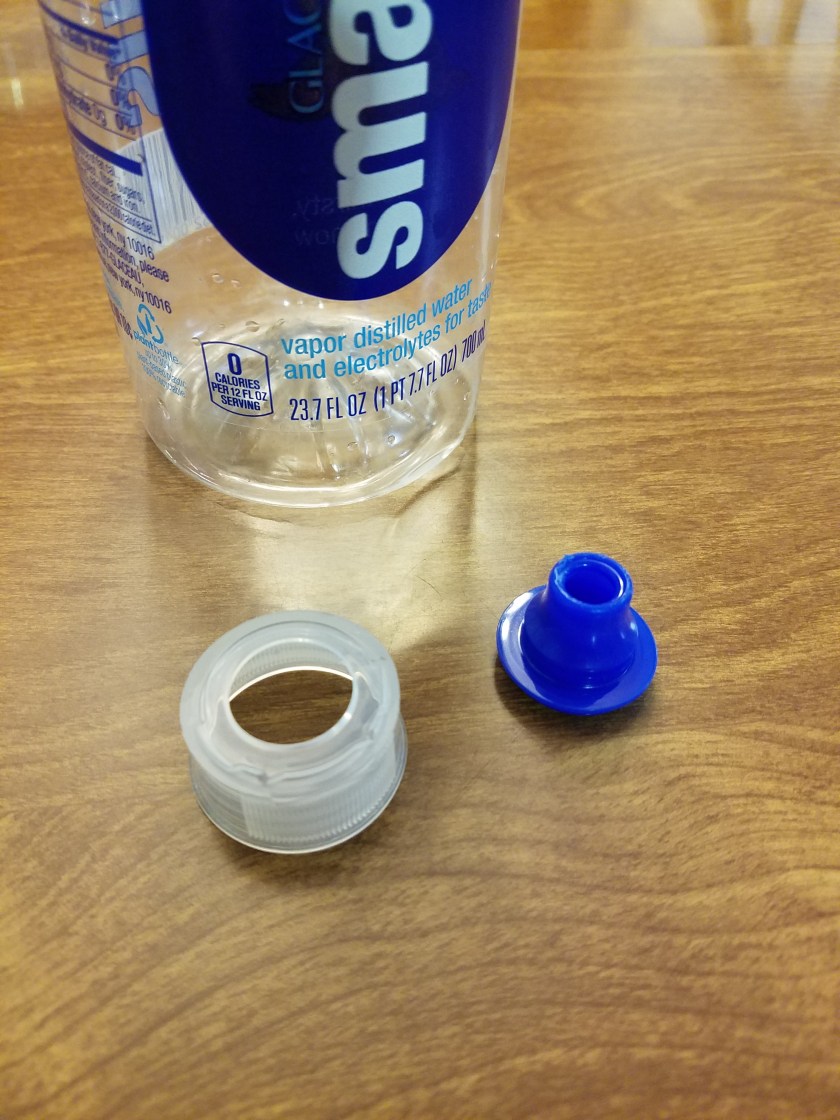
As providence would have it, the tip fit EXACTLY onto the spray paint can top. It snapped right in. Didn’t need glue or anything. Tender mercies.

20171011_222010

Next I wanted to paint the cans to help give them an industrial/dangerous feel. I masked them off with masking tape and then painted them yellow.

20171014_114933

20171014_115951

For the pilot light, I had a lighter lying around with a bendy neck, like this one:calico-brands-bouiif-1-72-cs-flexible-neck-utility-lighter_3251697

I took it apart, being careful not to blow myself up. I sanded off some of the black paint, drilled a hole in the caulking gun and attached it with a nut and bolt.

I found a sink hose at a thrift store. There was already a hole in the back of the caulking gun where I removed the plunger thingamajig, so I fed through a bolt and glued it into the end of the hose.

20171027_151430.jpg
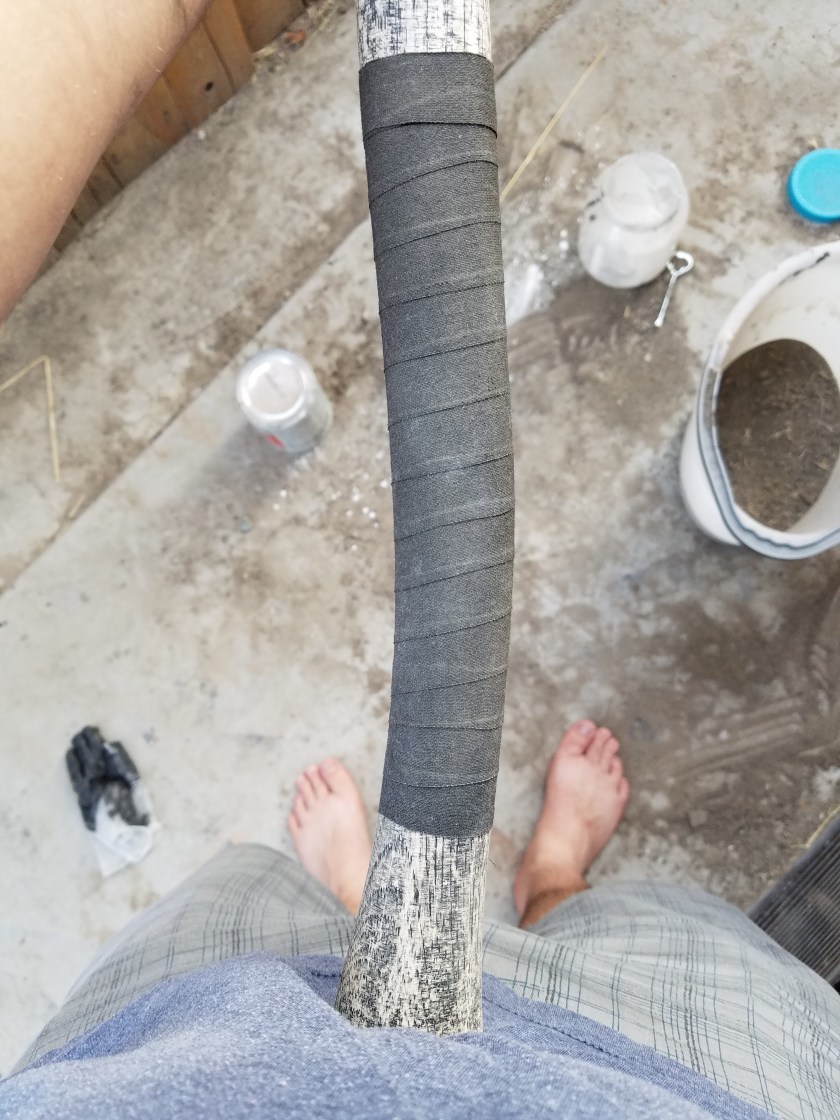
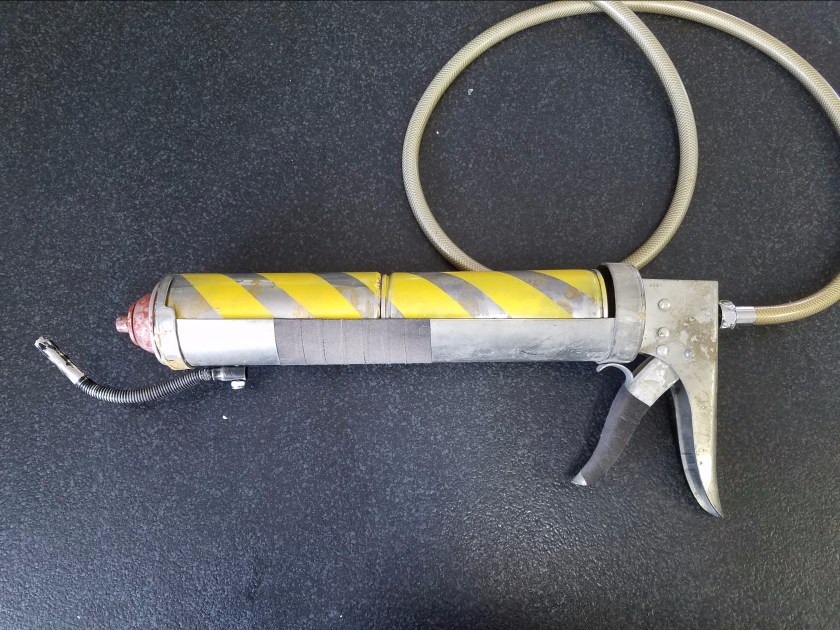
Final Touch was to add some grip tape to the trigger and fore grip, glue in the tanks and nozzle, and give the nozzle a bit of rusty paint, and give the whole thing a touch of dirt. Mutants beware.

Very Distressing

In the apocalypse, no one washes their clothes. They’ve got more important things to worry about. Like how to keep the zombie hoard from chewing on your face, or how to keep your 12″ mohawk up when there is no more gel.

Today we will learn a method of making clothes look super dirty and worn. You can also use this method to turn new jeans into old looking jeans, and then flip them for a huge profit, like Nordstroms

Today I did a pair of pants for Braxton, and a jacket for me. First step was to find a pair of pants, preferably cargo pants (you’ll need lots of pockets if you want to survive) at a thrift store, and I got the jacket from Wish. It’s a website/app where you can buy stuff directly from China. The upside is it’s super cheap. The downside is that it takes a long time to get here, the sizes are always off, and it’s never as good as it looks in the picture.Screenshot 2017-08-17 22.17.25

In the picture it looked like it was a canvas material. Turns out it’s really crappy polyester. It’s fine since it’s just for a costume, but if this were the real apocalypse… I shudder to think of my fate. Before I could do anything, I had to cut off these stupid cuffs. +10 points for effort, China, but I’m gonna call this one a fail.

20170807_200446

Anyways. First step is to rough them up. They will need nicks, cuts, etc. to sell it. I used the edge of a serrated pocket knife to get the job done.

20170807_191528

Spend extra time wearing the spots where it would naturally be worn, like down by the heels, on the knees, by the pockets, ect. Then I put in an actual cut so that I could so it up.

20170807_192958

The fact that my sewing is terrible really helps to sell the effect.

20170807_193555

Now that this is all sewn up, this boy is ready for the dirt. I repeated this with my jacket.

20170807_202930

The first step is to put on some gloves and dip my hands in black paint. Then I kida scrunch up the pants and get a little paint on there, gently so it doesn’t really build up. just a little here and there.

20170809_192744

Then- you know it- I rubbed some dirt on it. The dirt will stick to where the paint is. You can see that jar there with the white powder- that’s cocaine. But I also have another jar that is not picture that is diatomaceous earth. Any white powder will do. I sprinkle some of that here and there to give it some highlights.

20170809_192521_002

Once that is all done, I hit it with some matte clear coat, which helps trap the dirt in there, so it doesn’t just fly out when you dust off your pants.

20170809_194519

Here’s a before and after on these pants.

20170807_194324

Here’s some pants for me and for Raegan that I did.


So it’s a pretty cool technique, one that I can’t take credit for myself. I learned this one from Nuclear Snail, a really cool Youtube channel all about Post-Apoc costplay. Check it out.

Badland Beatdown

Sorry it’s been so long. I’ve been hard at work and taking lots of pictures, just haven’t found the time to get it on the blog. But here we go. Today I’m showing you how I made 2 mean looking melee weapons. Whether it’s zombies, terminators, raiders, or white supremacists (too soon?), you’ll be ready to dance when you’re rocking one of these.

20170817_194655 Edited

My first step was to acquire a wooden baseball bat and an axe handle. After checking every thrift store in town, and asking around on facebook and coming up short, I bit the bullet and had to buy them new. I spent around $30 for both of them, the bat from a Big 5, and the axe handle from Ace’s. Also acquired from Ace was the hardware I needed. Say “Hi”! I sanded his eyeballs so that they would rust better… We’re not on great terms at the moment…
20170808_221212

Next step was to sand off all that shine. Nothing is shiny after the apocalypse.

20170809_173816

For the axe handle, It wasn’t lacquered, so no need to sand, but I did want to make it look old. So what I did is I put on some rubber gloves, dipped my hands in some black paint, and rubbed it all over the bat. Then quickly before it dried I sprayed it off with the hose. The black paint stayed in the grains but washed off everywhere else. It was a pretty nice effect. I won’t tell you about how initially I thought I would paint it black, then immediately regretted it and tried to wash it off, and that the resulting effect was just a happy accident.

20170815_184004

While I was doing this, my hardware was rusting away in our vinegar, salt, and hydrogen peroxide solution.

20170809_081823

Next step for the bat was to drive the nails through the bat. They are much too big and would split the wood, so first I drilled holes. Then I hammered the nails in. I initially thought I would cut off the nail heads and sharpen them to match the other end, but I decided I like the look of it with the nail heads still on. It looks more barbaric. Remember: the mutants are no longer human. They show no sympathy and deserve none in return.

20170809_190028

Here I’ve finished driving all the nails. I was going to do 2 more, but I broke my drill bit. >_<   Not pictured here, but I then sprayed some matte clear coat on the bad, and then rubbed some dirt on it. The clear coat helps the dirt to stick, so it looks dirty. Because there’s a lot more dirt after the collapse. No more street sweepers, you see.

20170809_201242

Next step was to wrap them with grip tape. I got a roll of it on amazon. Goes on real easy, and really gives a nice grip.

20170815_190114

Then of course, I rubbed some dirt on it.

20170815_190400

Then I drilled a hole in the axe head, and attached the circular saw blades with a nut, bolt, and washers. The hole was a little small so I had to use a wrench to get the bolt in.

20170815_185429

Here I can be seen wrapping the bat in barbed wire. There was this kid out riding his bike and he kept riding back and forth in front of my house, sneaking glances at me. Can’t say I blame him. Neighbors probably think I’ve joined Antifa.

20170816_185305

So here’s a close up of the finished bat. I think I’ll call it… Lucille 2. That’s a double reference. If you get both, let me know in the comments and I will love you forever.

20170817_194715

And here’s a closeup of the finished buzzsaw axe. I don’t have a name for this one. Let me know if you think of something good.

20170817_194729

That’s if for this episode. It was a fun project, I’m happy with how they turned out. Cost me prolly $60 for all the parts, but that would have been a lot less if I had managed to find more parts used. But such is crafting. Let me know what you think. Don’t forget to subscribe or share or something. Make yourself useful.

20170817_194655

I model on the side…

Today I’m taking a break from costume creation to focus on digital content. Now some people don’t know this, but much of what you see in movies and TV these days, isn’t actually real. No seriously, it’s what we call CGI, or computer generated imagery. It only looks real.

For our backdrop this year, it’s looking like it will be primarily CGI, and I will be doing most of the modeling myself. How does one make a 3d model on a computer? Well, I’m glad you asked. There’s a few different ways to go about it, but for the bus stop I created today, I did what’s commonly called box modeling. As you will see, I literally start with just a box, and begin to tweak it, stretch it, and mold it into what I want it to be. You can start with a box, a cylinder, a sphere, a plane, or any number of primitive geometric shapes, but the principle is the same. Then you turn on your favorite Spotify playlist, get in the zone, and before you know it, it’s done! It’s just that easy folks. I modeled this bus station in 2 minutes and 15 seconds flat. Here’s the video to prove it. Thanks to my brother Matt for providing the music. I stole it off his Soundcloud. I’m sure he’s cool with it…

Kinda nifty, huh? What happens after you model it? Another astute question. I just so happen to have also modeled this street light. Spoler alert: It’s gonna be an urban scene. Here’s the street light in quesion:

StreeLightModeled

Pretty simple stuff. I just started with a bunch of cylinders for the base, the pole, the coupler and arm, and a box for the head. The next step is called UV layout, and it suuuuuuucks. Generally regarded as the most tedious and least fulfilling part of 3d modeling, but it must be done.

StreetLight_UV

Here I am in the UV editor. Laying out UVs is like skinning things. Like skinning a deer so you can stretch the pelt to make leather, it needs to be flat. In order to map textures onto any 3d model you have to skin it and lay it out flat. It’s all very tedious and boring, so I’ll just mention that the point of the checker pattern is a tool to make sure that the different sections are sized the same. Once that’s done, the fun can begin.

StreeLightLayers

The next part is texturing, which is the reward you get for suffering through the UV layout. I’m using a new program for me called Substance Painter. It lets you paint directly on the model using materials. So you can see in the Layers panel in the top right, I have a rough iron, rough rust, and fine rust, and I can use a paint brush to blend them together. It works very well. You can see on the concrete base where I painted in some rust streaks coming off the pillar.

StreetLight_Head

Here’s a view of the head of the streetlight. I’m adding some rust. Surprised?

StreeLightRender

Here’s a test render of the finished model. The environment is just for testing purposes, but it’s pretty close to what’s in my brain. Anyways, we’ll need to add some lights to this lamp post, but besides that, I think it’s done! Actually, now that I’m looking at it… I think it needs more rust….