Fin

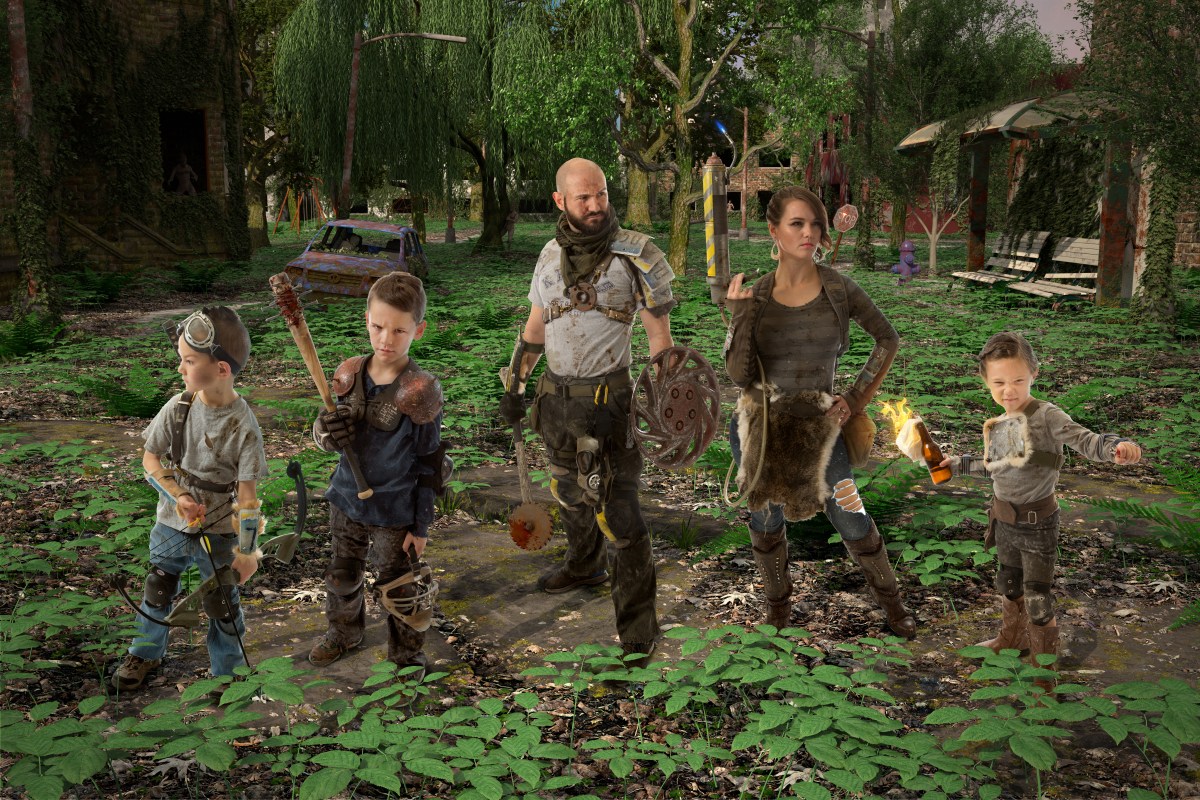
Finally. After 8 months of work, I’m am very happy with the way this turned out, and to be quite honest, very happy to be done with it. I kinda burnt myself out there towards the end and had to drag myself across the finish line, but we got it done.

So a big thanks to Susan Robertson from Forever Keeps by Susan for volunteering to do the photo shoot for us, as she has done for the fourth year running. She is a great photographer and always very easy to work with. Here’s a few raw shots from the shoot.

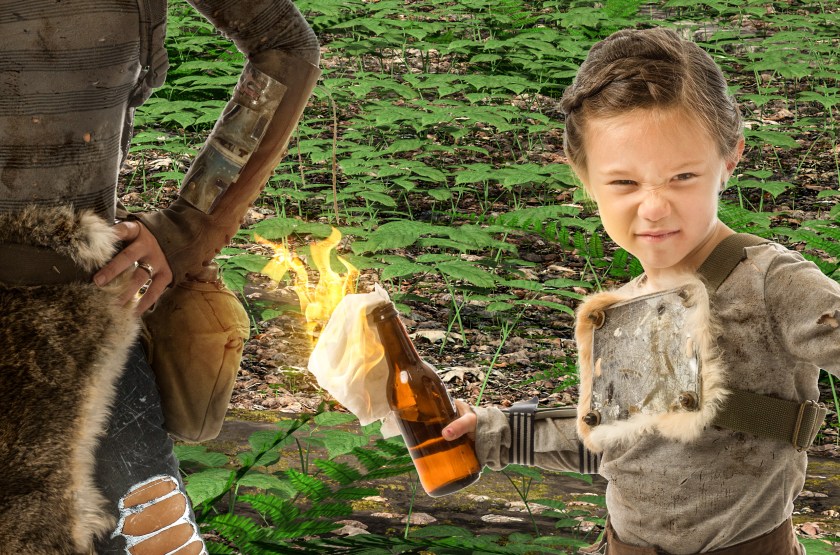
First up was Ryder, age 7. Since he went first, I think he was a little shy, so he wasn’t quite as expressive as he has been in years past. We eventually went with the picture on the right. While we only see his face in profile, I think it helped the overall composition as it mixed it up a bit. It helped the visual story telling a bit, as we are all on the lookout for the creatures lurking in the shadows, and Ryder sells that most of all.


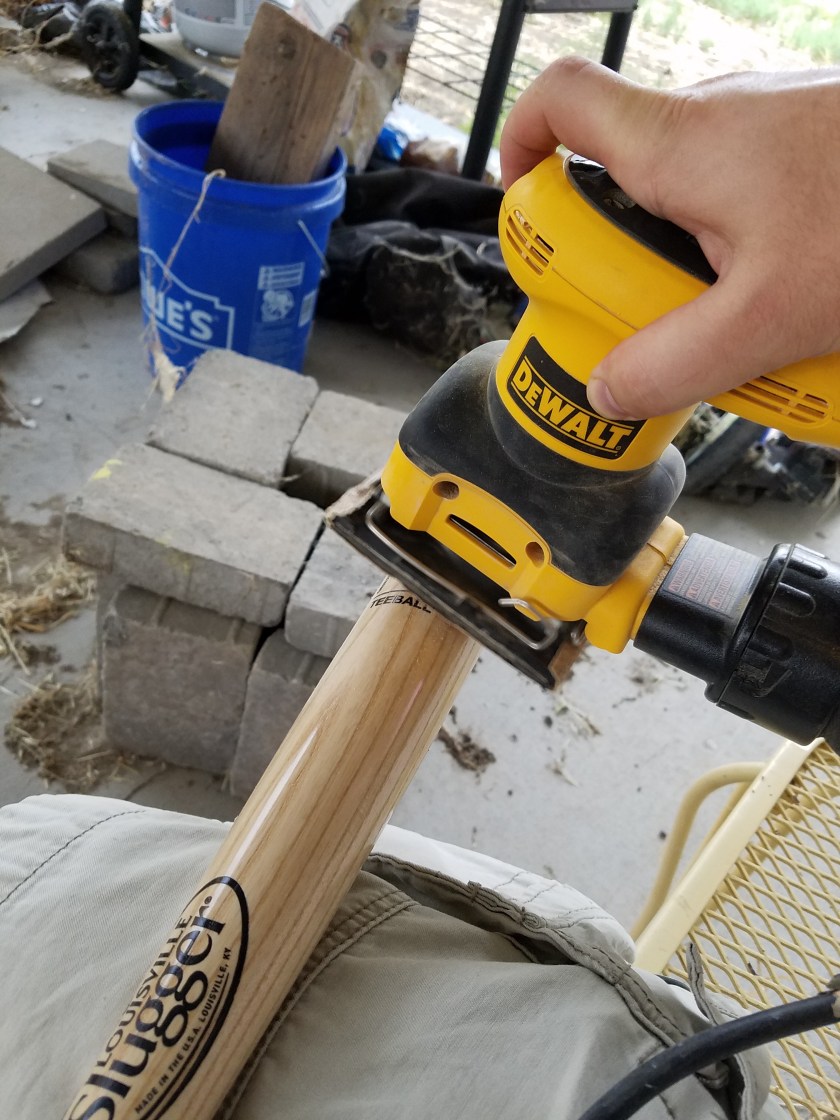
Braxton, 9, was next up to bat….. Bwahahaha, see what I did there? Braxton had “the look” down to a science. He gave us plenty of great shots to choose from, and these were the top 3. Ultimately we didn’t want his mask covering up his head, so we went with the one on the left.


Raegan, 5, has always given us great sassy faces, but this year she was having a real hard time not laughing. I almost went with the one on the left where she has the bow, but since we decided on Ryder holding the bow, and because molotovs are indispensable to any group of survivors, we went with the middle one. I didn’t really want her to be in the act of throwing it, since we are just on the lookout, not actually in combat, but since this was the best shot we got, I settled.


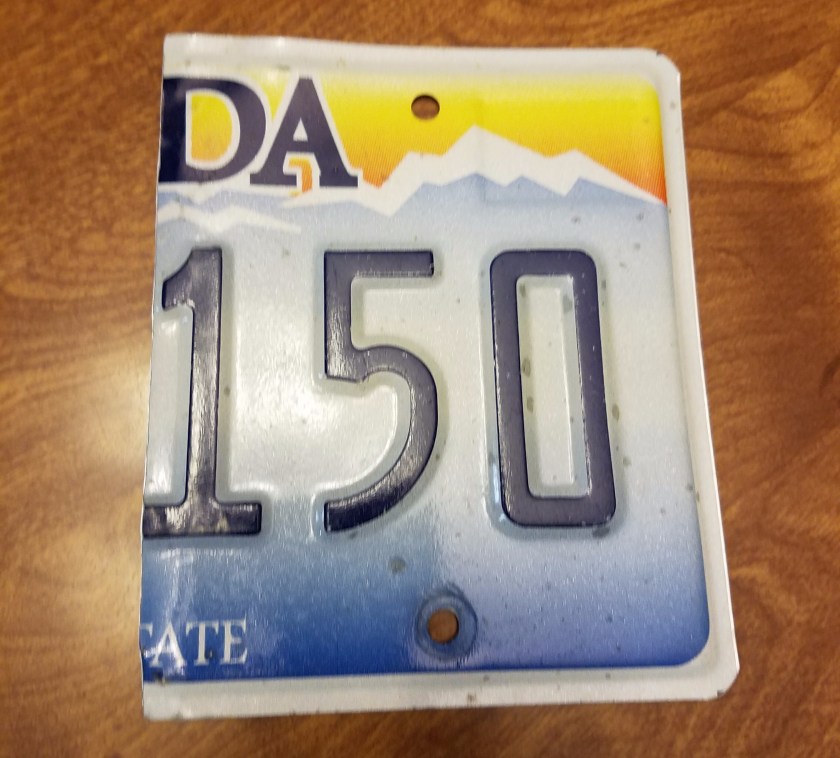
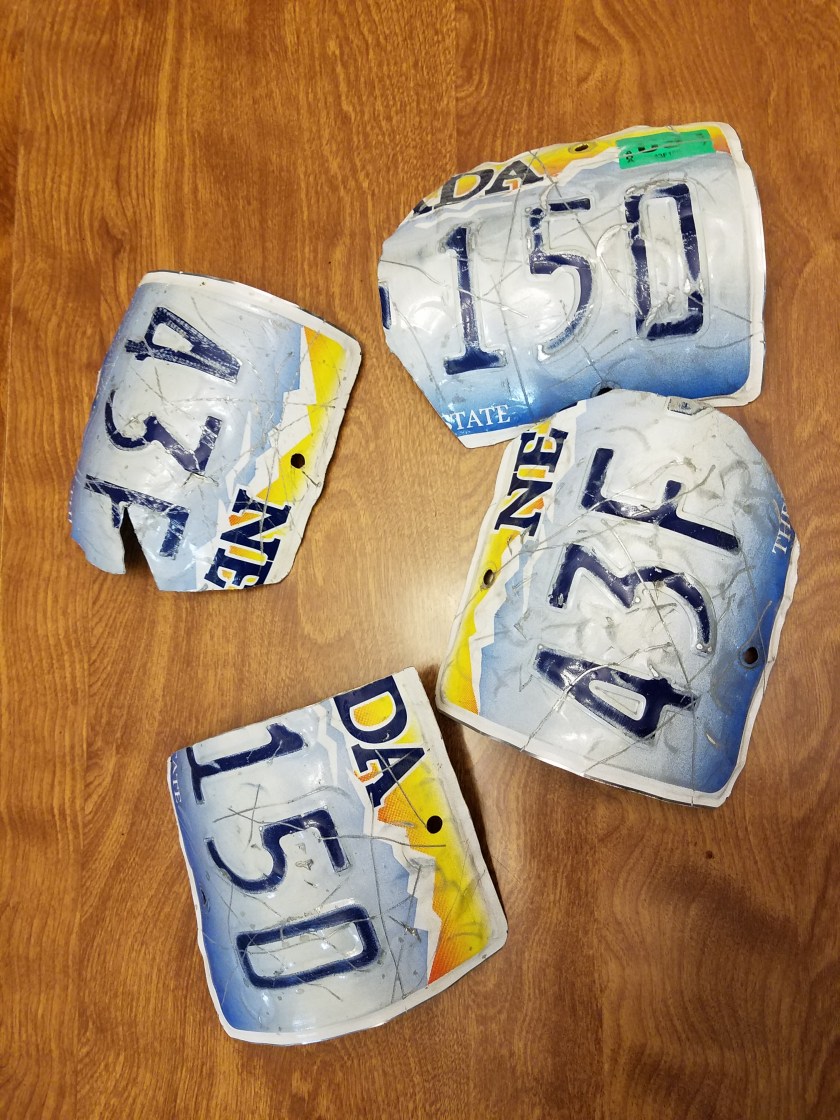
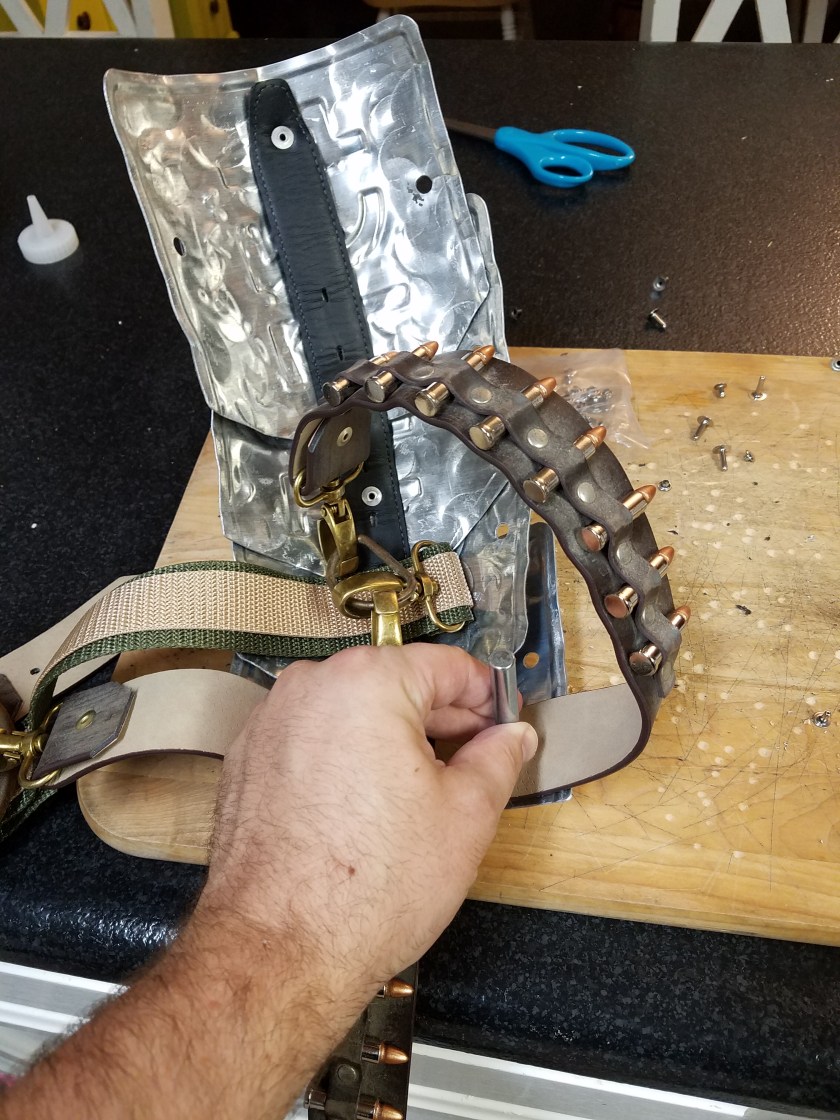
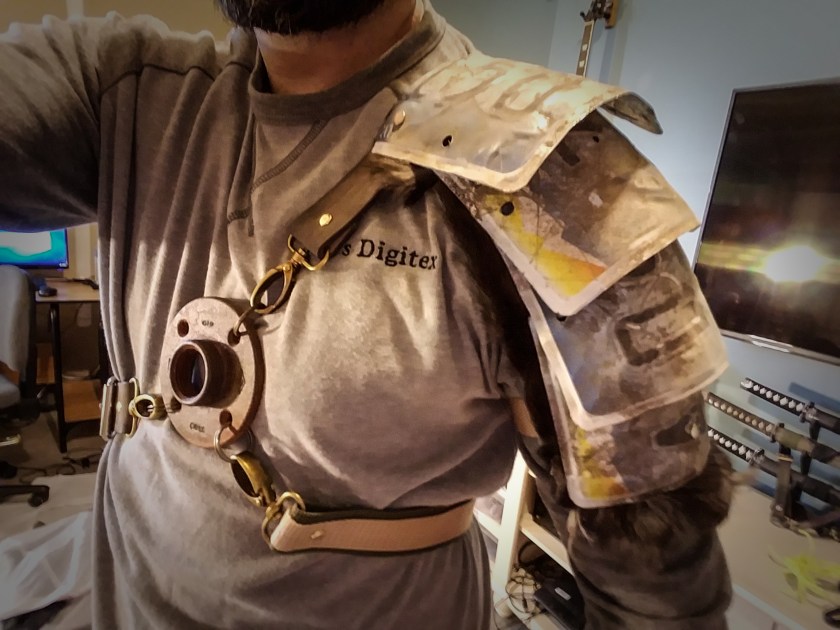
I was up next. Of course the first shot of myself was the best photo Susan ever had the pleasure of capturing, and every subsequent shot was better than the last, so it was really hard to choose. I liked my facial expression from the shot on the left the best, but I didn’t like how my license plate pauldron (shoulder armor for you rubes out there) was angled away from the camera, I opted for the one on the right.


And last but certainly not least was my beautiful wife, Kristen, age Immortal. One could rightly ask, “In the apocalypse, do women have the time, means, and drive to put on makeup and curl their hair?” But the joke would be on you, because that’s how she looks when she rolls out of bed in the morning. I went with the one on the left because she looks the most bad ass, and because her shoulders are square to the camera, and it hides the fact that she does not actually have a fuel tank on her back, just a regular backpack.

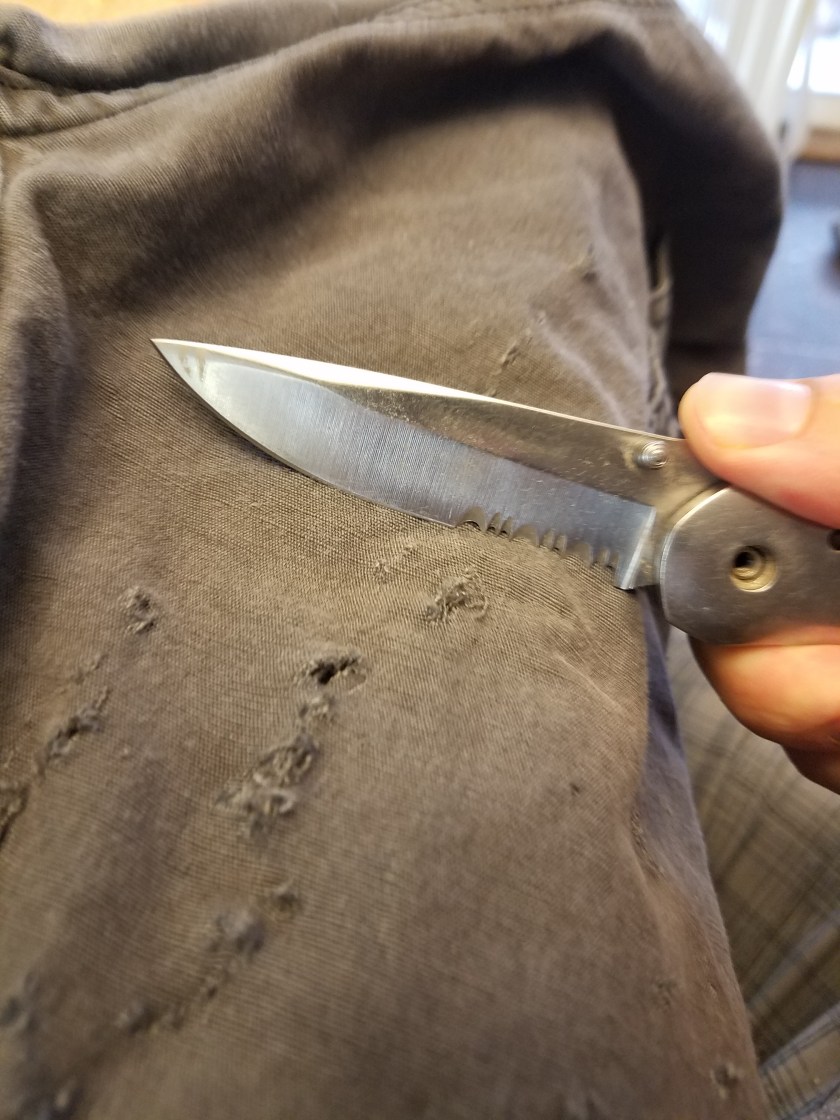
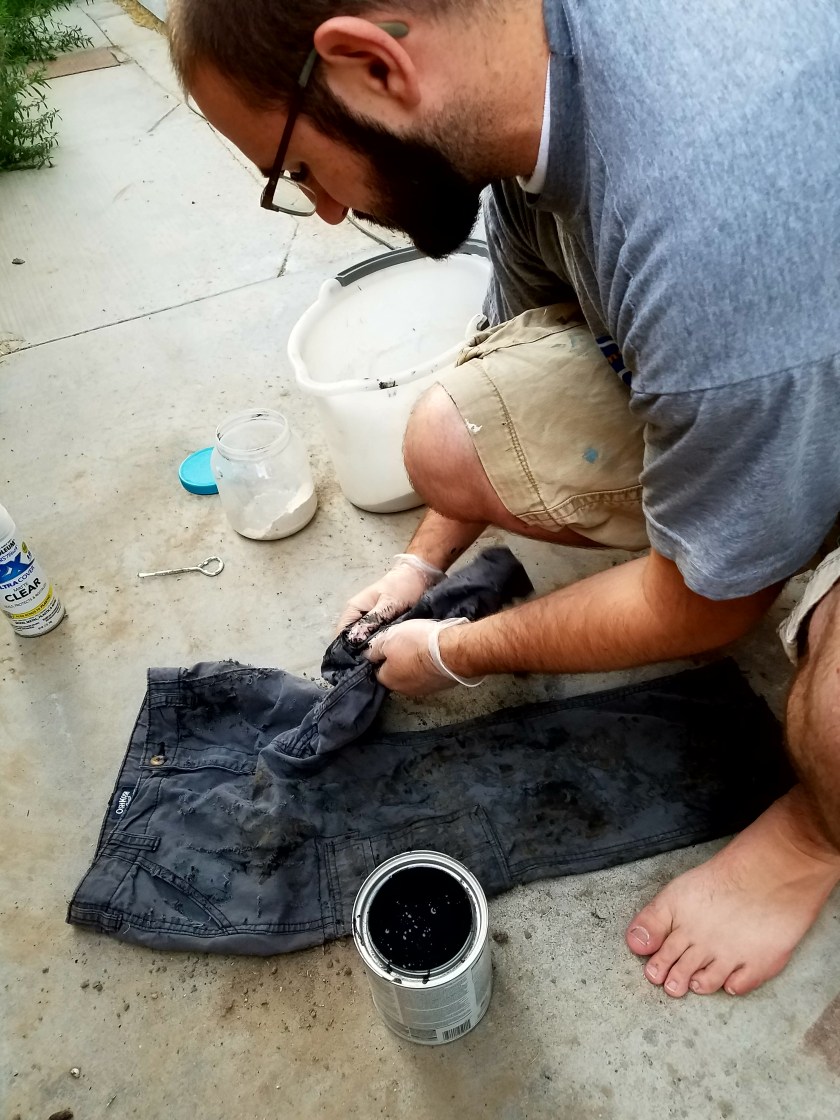
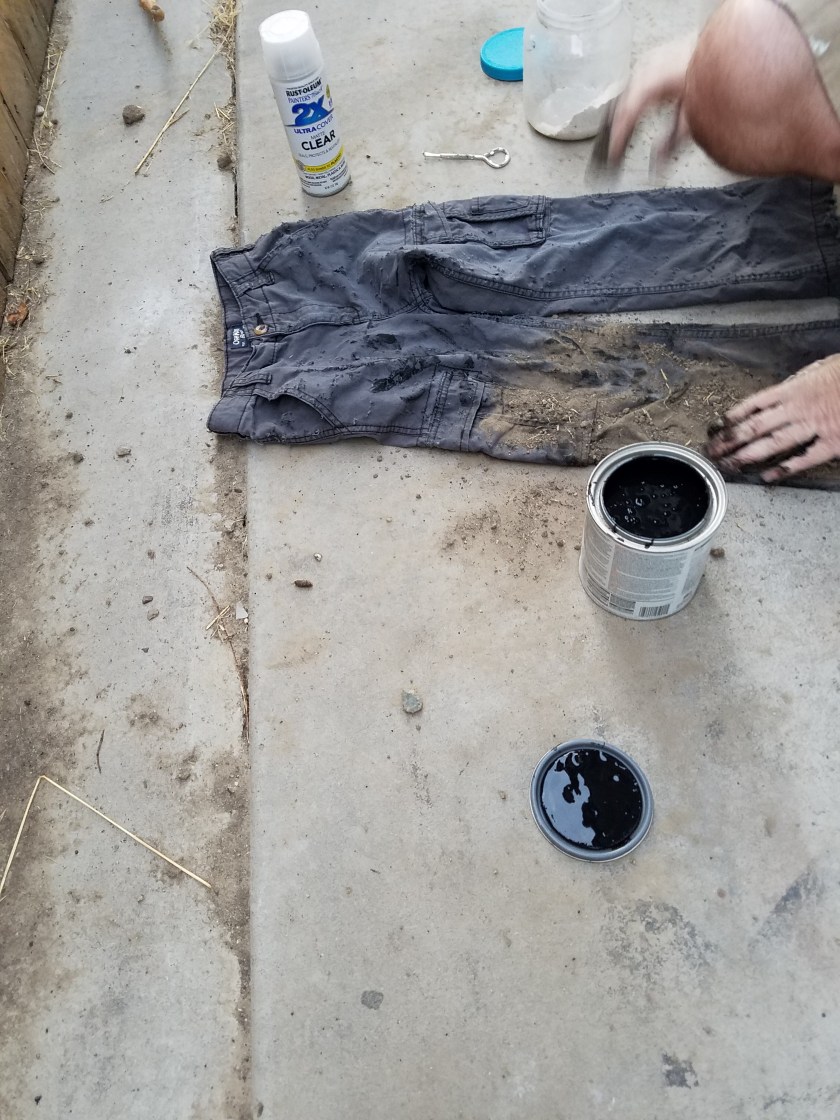
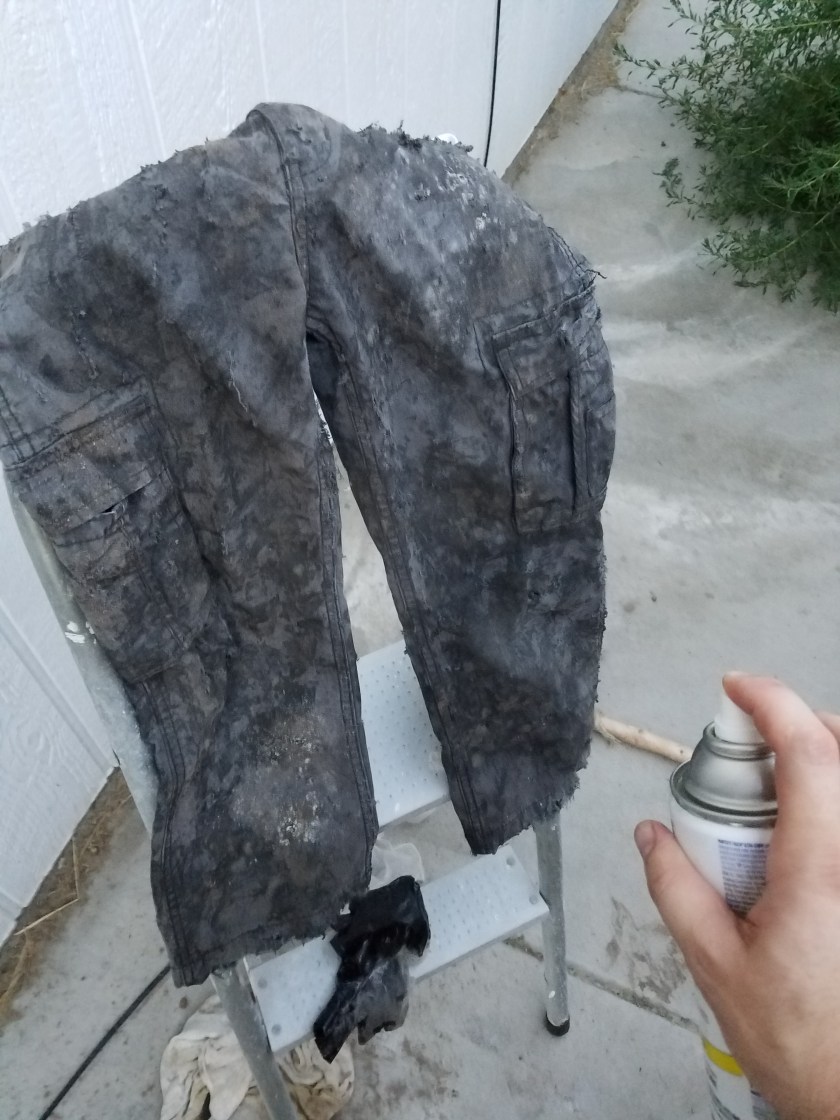
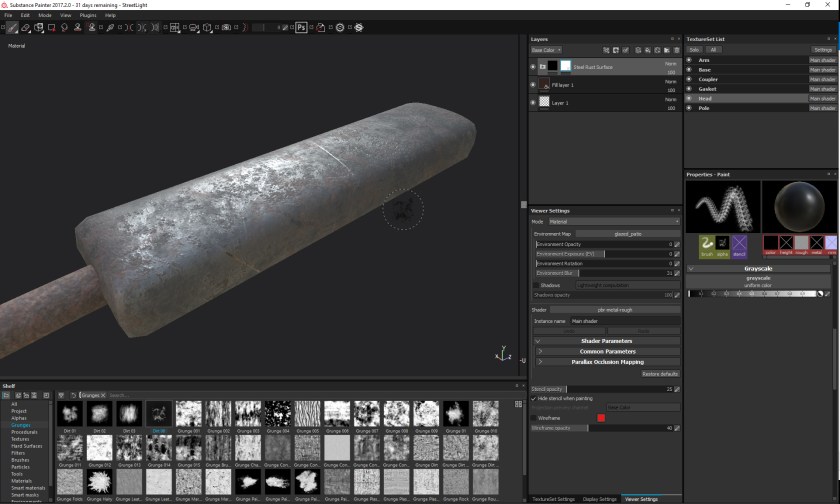
Then it was off to Photoshop. First step was to cut us all out. Since most of the background was pure white, it was easy to mask it out. I had to do it by hand down around the legs and feet, but that was easy enough, just takes a little patience. Next step was to do standard touch ups, like brightening the eyes, removing any skin blemishes, dodging and burning to bring out details, etc. After that I had to dirty us up.

Kristen_B&A.jpg

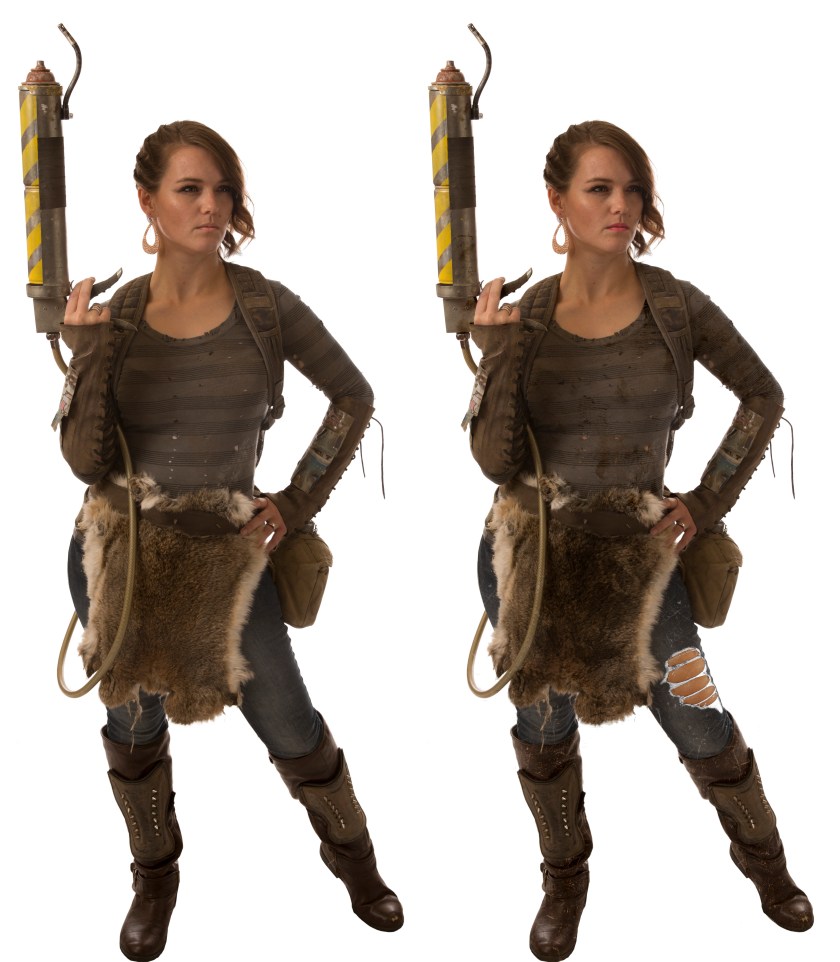
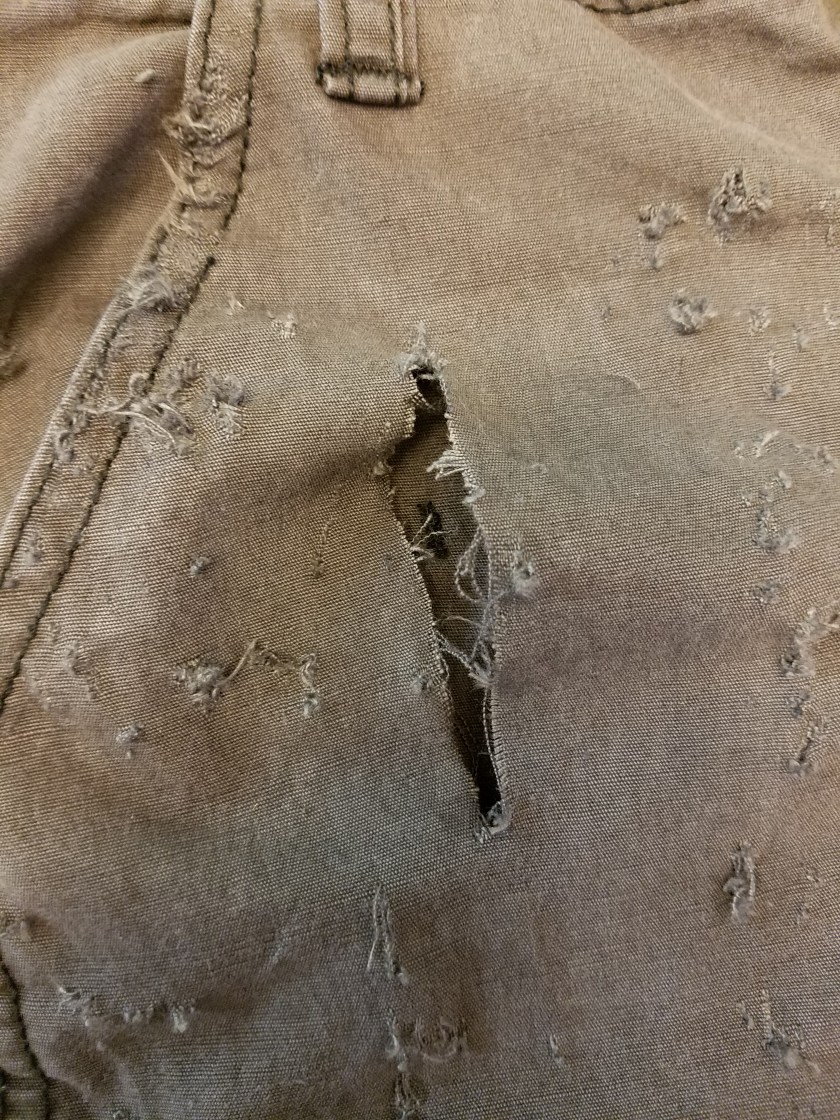
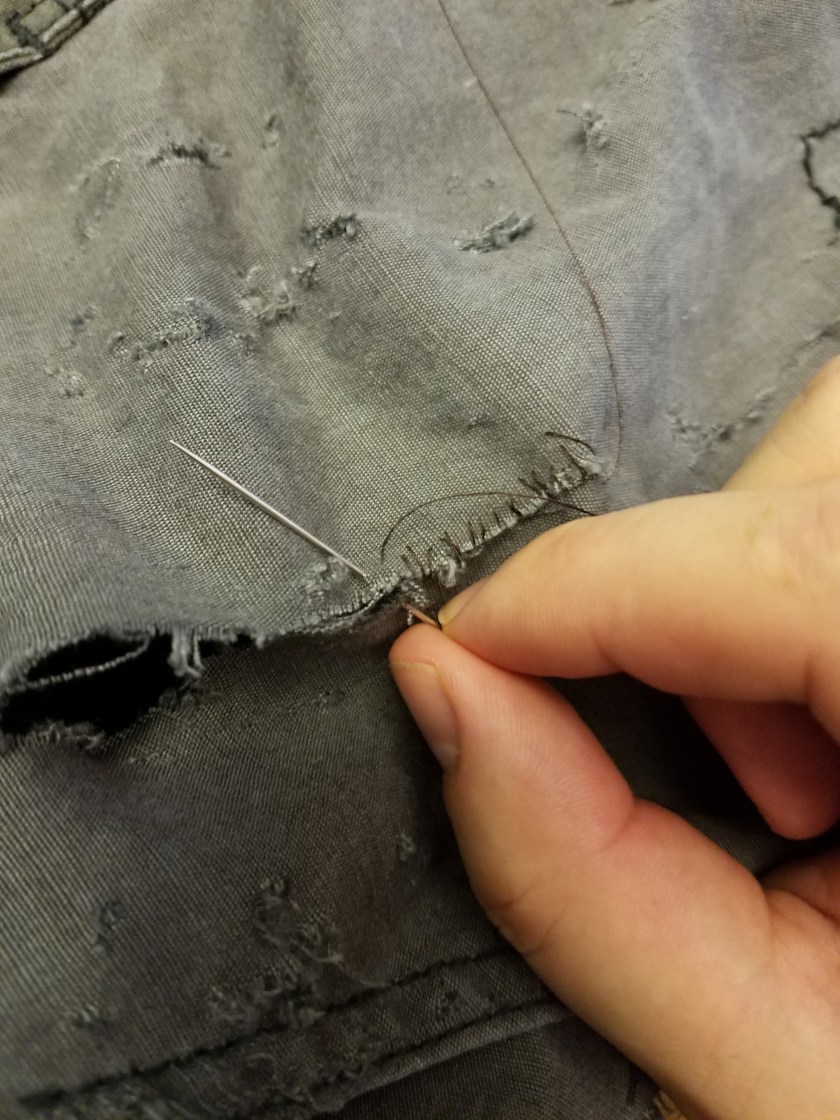
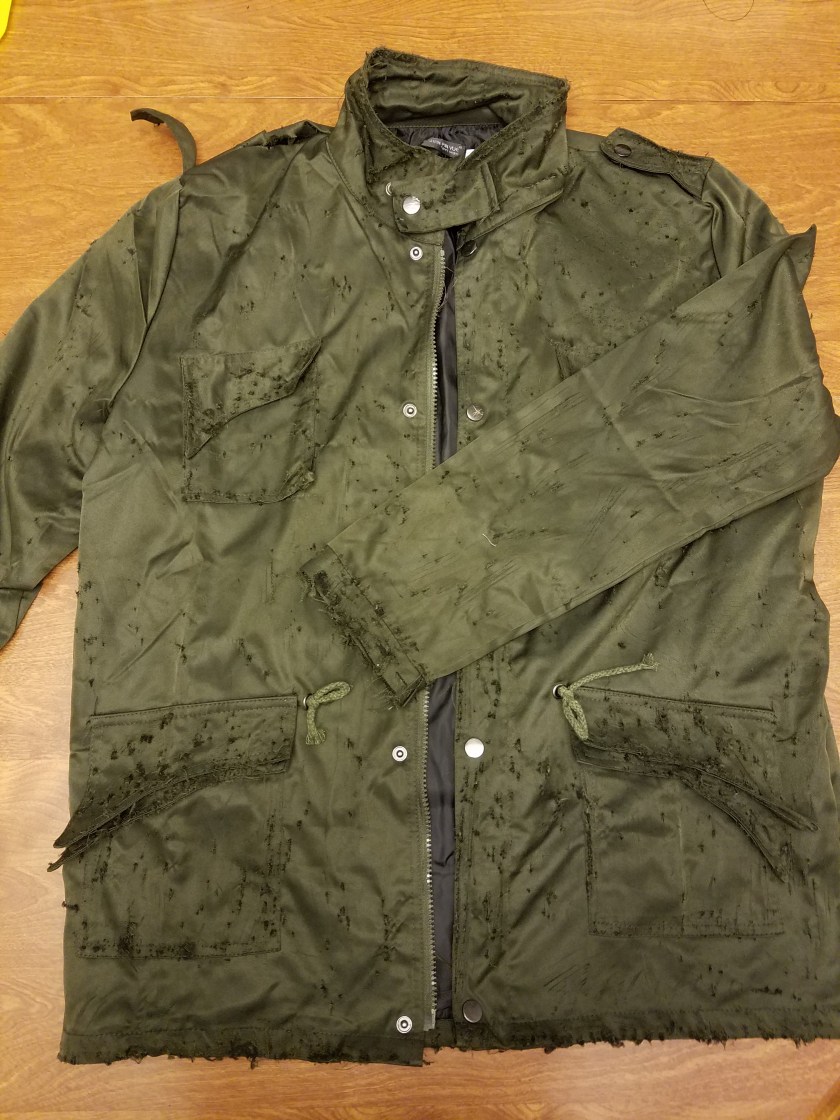
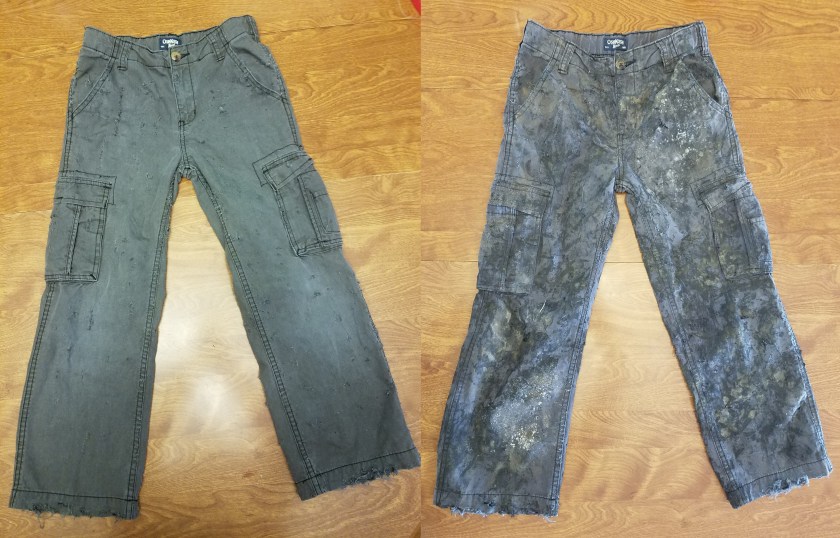
Here is a before and after of the work I did on Kristen. Among the changes I made were tearing a hole in her jeans, adding stains to her shirt and skirt, adding scratches to her boots and pants, and adding lipstick, which she forgot to put on… When I said she rolls out of bed looking like that, I mean everything besides lipstick. That’s the one thing.

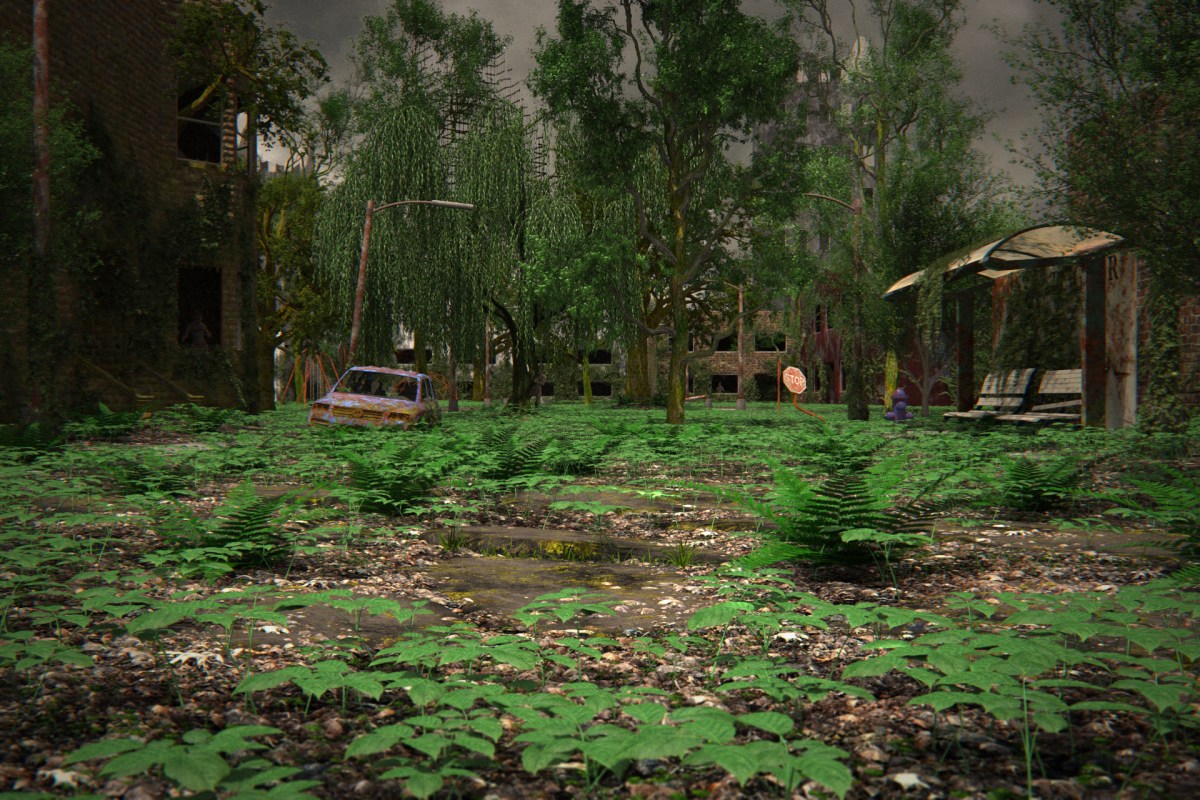
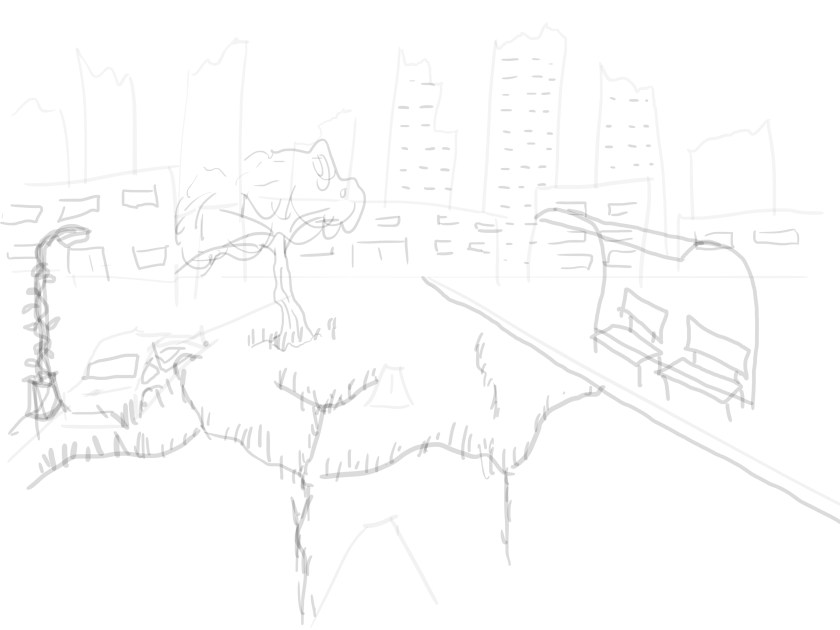
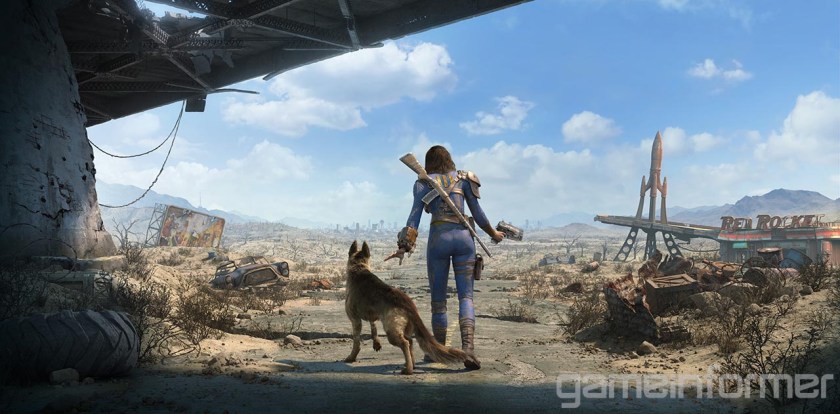
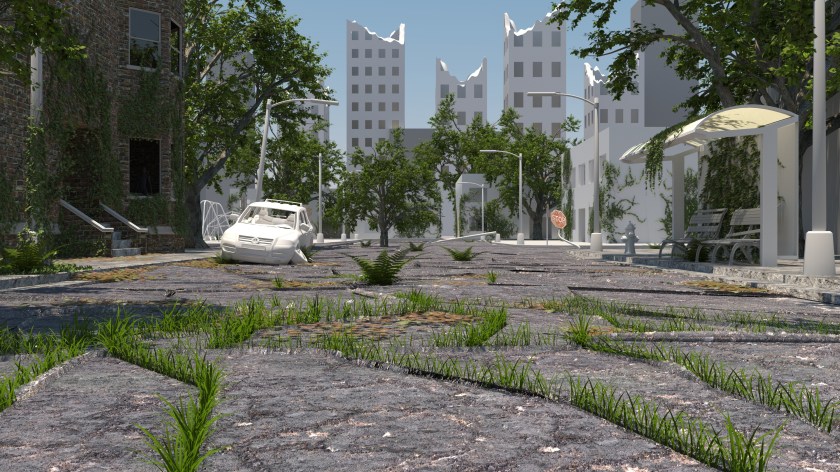
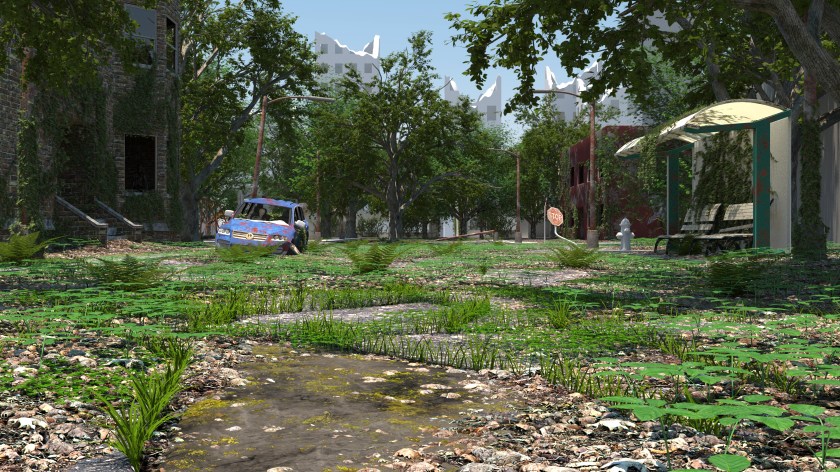
After that was done, it was time to composite. Step one was to place us in the scene, and then rearrange key objects in the scene that were now covered up by us. For example, the car with the skeleton in the passenger seat needed to be moved a bit, the willow tree with the creepy creeper peaking out was behind my head, so that needed to be moved, etc., and I had to change the position and angle of the camera a bit to match the angle and position of the camera we did the shoot with. I also moved the light source a hair to match that of the shoot.

The next thing I did was add in digital mannequins as stand-ins for us. What’s the point of that, you might ask? Simple: Shadows. When you are compositing one element into another scene, the number one thing that sells it is shadows. I could have tried to had paint the shadows, but I don’t think I could have done a real convincing job, especially onto such a cluttered scene as this.

Standins

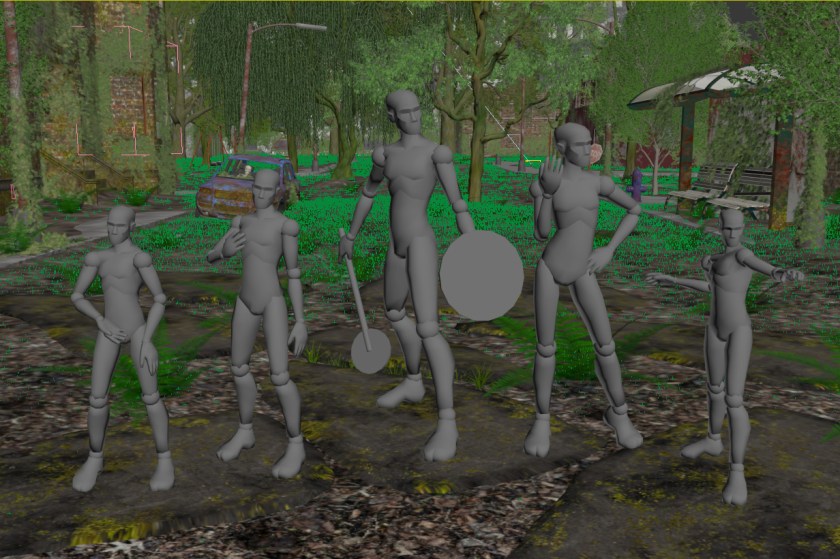
So I sized them, posed them roughly like us, and mainly made sure the feet lined up, as the light was pretty diffuse, and the shadows get lost pretty quickly. I set it up so that the mannequins themselves are invisible, we only see their shadows, so it looks something like this:

Shadows


Once that was done I could do the final render. Rendering this beast was no easy feet, as the total size came out to a whopping 10,800 x 7200 pixels. The sheer size of it, plus the complexity of the scene made my computer weep and beg for mercy. Every time I tried to render it, or even just a small section of it, my computer would run out of memory and the software would crash. So I ended up sending it to a render farm, Rebus. This was my first time using such a service, and while it was a very easy and smooth process, it was much more expensive than I initially thought. So that sucked. But I got great results.

The other thing I wanted to do to really sell the idea that we were really physically present, was to have something covering us up, to give it some depth. I did this with some of the ground cover plants covering out feet. It’s a very simple and subtle thing, but it does wonder to sell the illusion.

sarsaparilla
To do this I simply just rendered the plants, and placed them on the top layer in Photoshop. Bingo bango.

After that was done, it was simple playing with the color balance, levels, etc, to make sure it all meshed together, and a few little tweaks here and there. Here’s some closeups of some interesting parts of the image:

Car

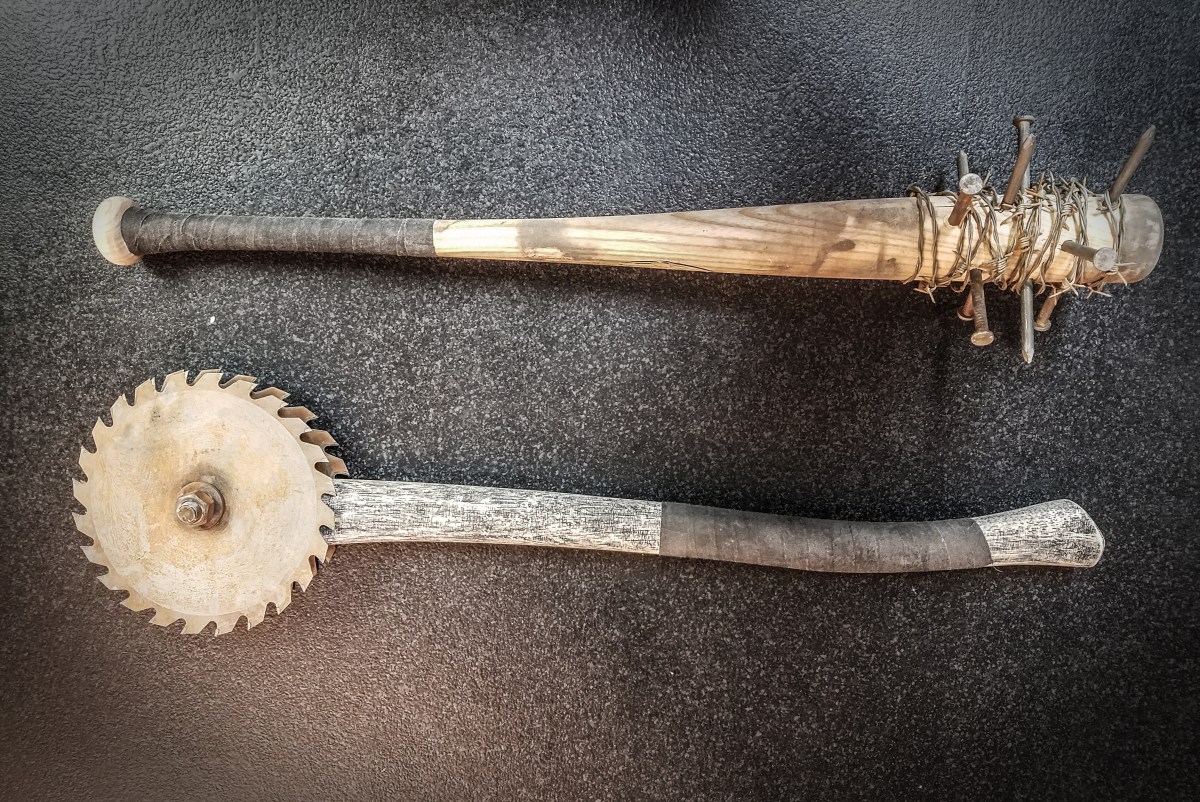
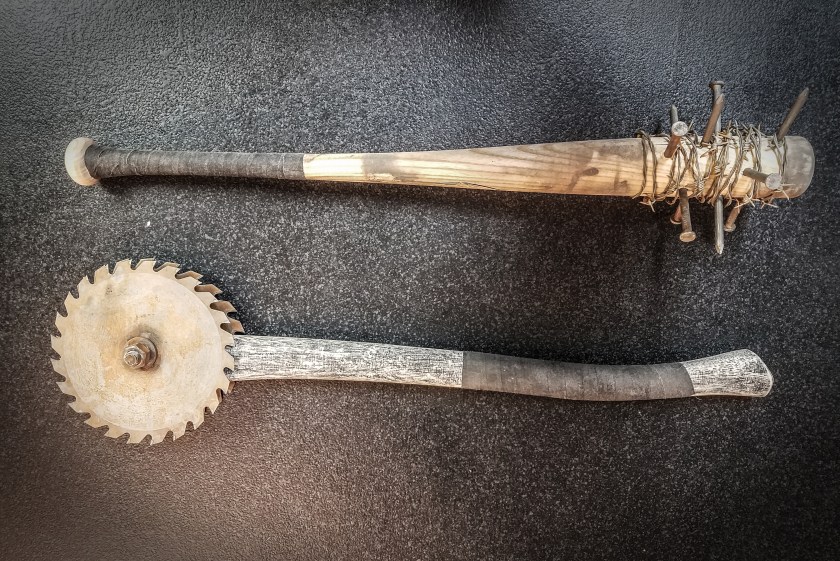
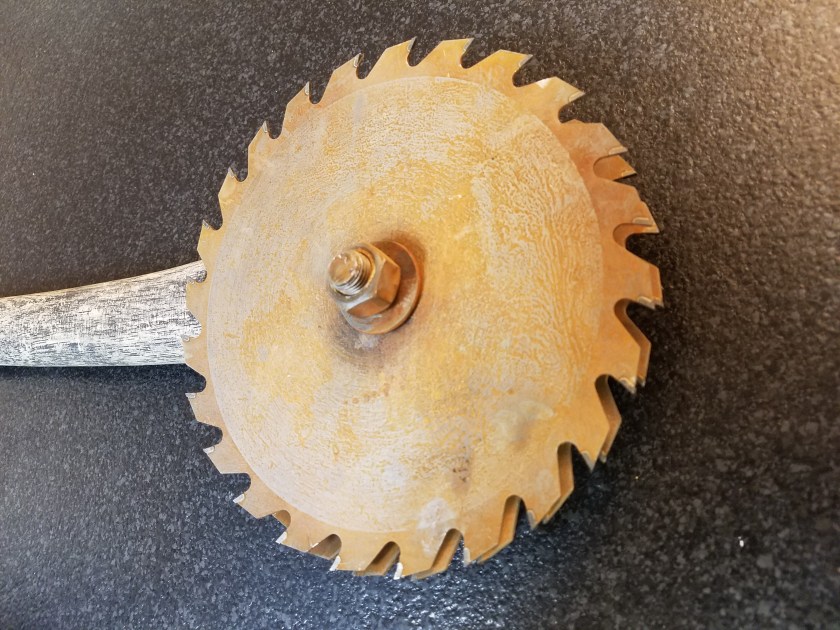
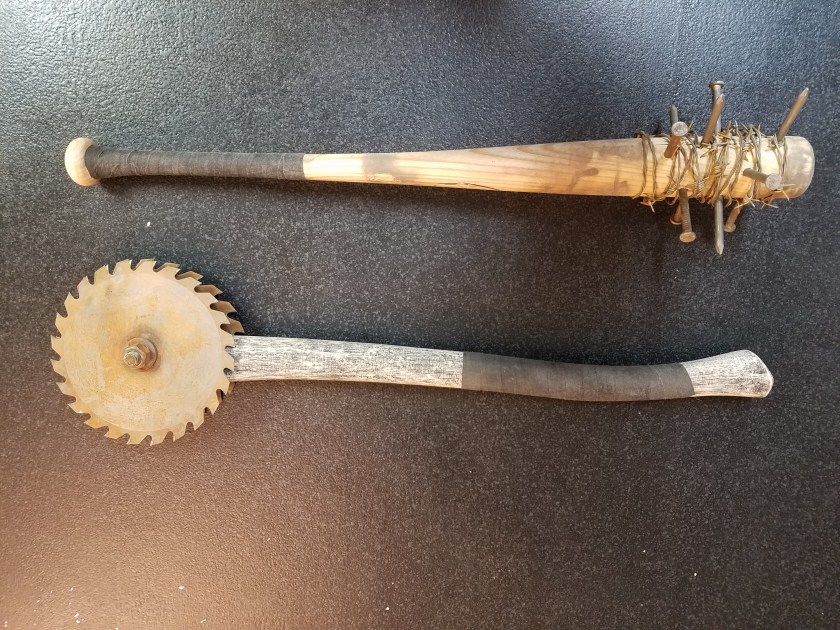
Here you can see both Braxton’s awesome bat, Lucille 2, and the rusted out/over grown car with this poor soul in it. A bit of visual storytelling.


Ground

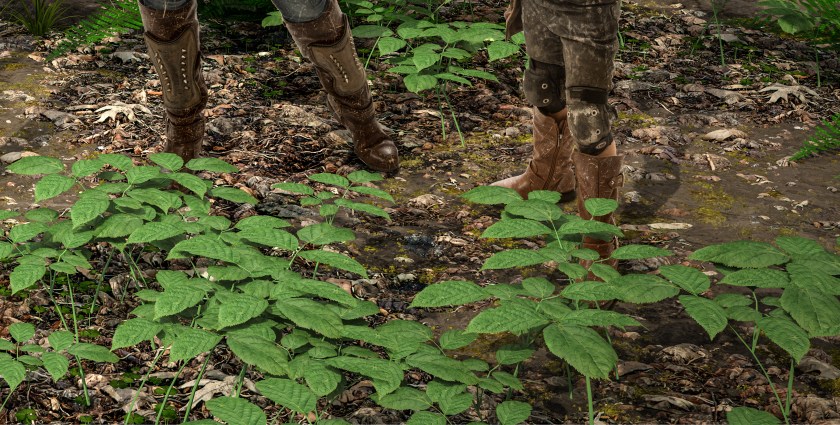
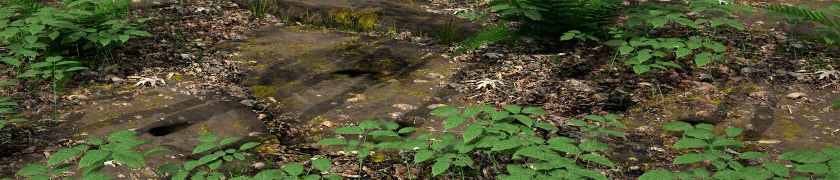
Here’s a closeup of the ground. I’m really happy with the way it turned out. I knew the ground and these plans were going to be the closest things to the camera, so I spent a lot of time on them. You can also see the way both the shadows and the leaves covering our shoes really sell the illusion that we are present there.


Creeper1

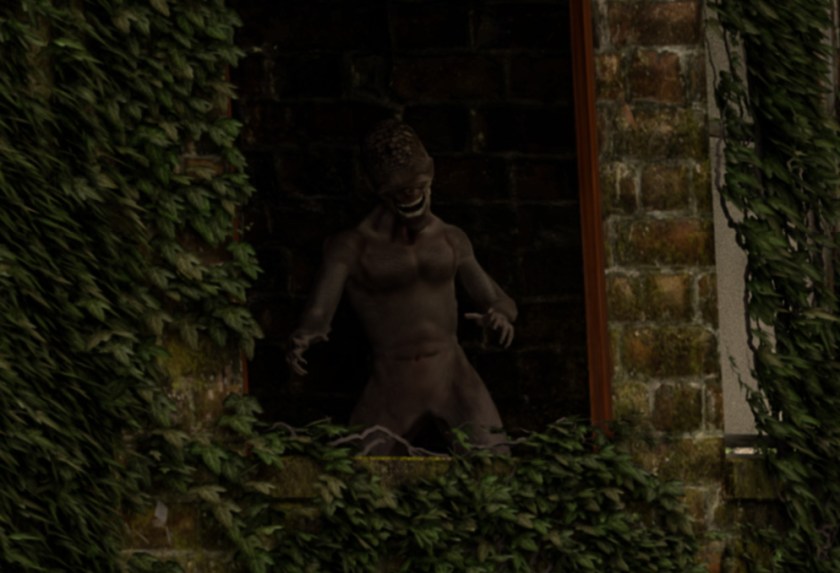
So here is our first creepy creeper. They’re not quite zombies, but some kind of humanoid creature. Mutant? Alien? Science experiment gone wrong? I’ll leave that up to the viewer.


Creeper2

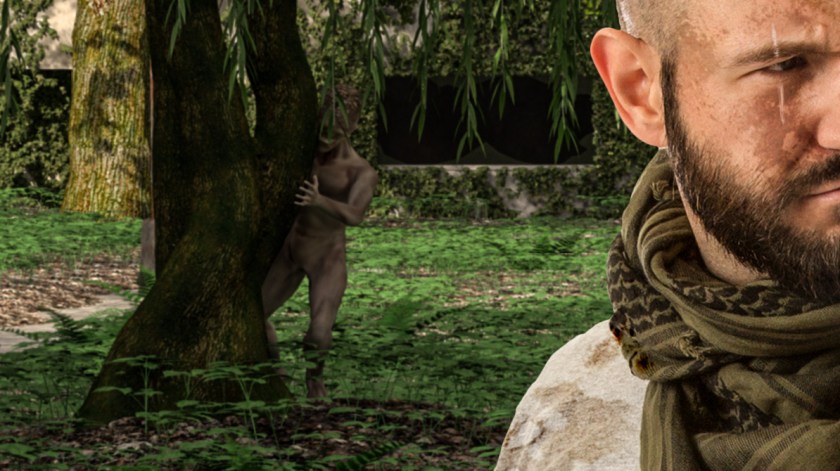
Here we have creepy creeper #2, peaking out from behind that tree. Now you know why we are all keeping such vigilant watch. Stay frosty out there.


Molotov

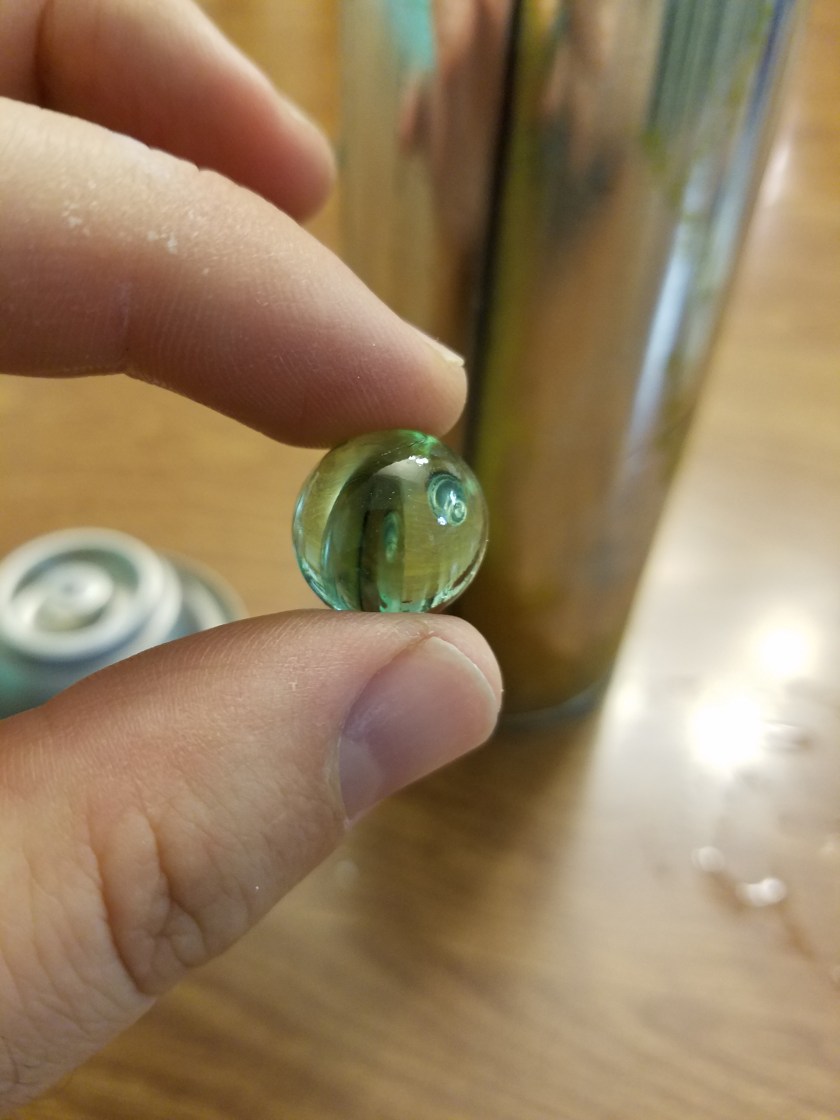
Here’s Raegan with her lit molotov. I added some glow on Kristen’s arm and canteen to help sell it. I thought about adding smoke, but that would have uglied up the image.


Torch

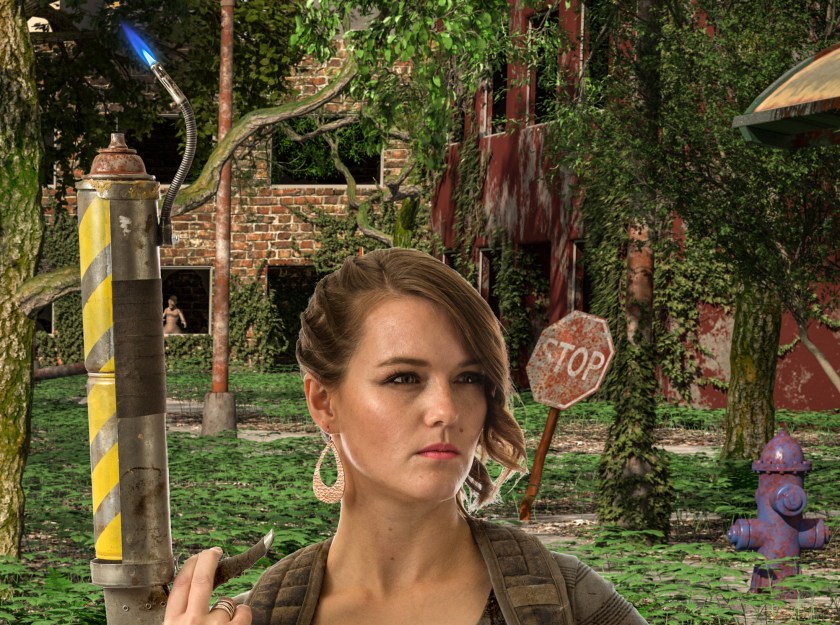
I like the blue pilot light on Kristen’s flame thrower. And I like Kristen. She’s hot. Can you find creepy creeper #3?

So that just about does it, folks. Thanks to all you guys who followed along. It was quite a bit of work, but I am very happy with the way it turned out. Who knows, I might even do it again next year.

-Brad

Flame On

Today we’ll be looking at how I created a flame thrower prop. In the wasteland, a good flamer thrower is an invaluable weapon against the horde, but proper flame throwers are hard to come by. But fear not, with a little Macgyvering you can build your own!

While I was perusing a local thrift store, I came across a larger than average caulking gun. It looked pretty old and beat up, and metal. It was a good starting place.

To fill the trough, I needed something that would fit snug and look like it could hold the pressurized fuel. I had a bunch of empty spray paint cans lying around, and they fit snug as a bug. First step was cutting off the top of one. I made sure it was super extra empty so I didn’t get a nasty surprise when I cut into it. 20171011_221906

Have you ever wondered what that thing rattling around inside a spray paint can is? Turns out, it’s a marble! When knew?

20171011_221920

I cut the top off for 2 reasons. One was so that two cans could fit together, and two was to be able to use the top as the end of the flame thrower. I needed a nozzle for the end, and I happened to have a smart water bottle lying around, and I like the look of the tip.

20171011_221937

As providence would have it, the tip fit EXACTLY onto the spray paint can top. It snapped right in. Didn’t need glue or anything. Tender mercies.

20171011_222010

Next I wanted to paint the cans to help give them an industrial/dangerous feel. I masked them off with masking tape and then painted them yellow.

20171014_114933

20171014_115951

For the pilot light, I had a lighter lying around with a bendy neck, like this one:calico-brands-bouiif-1-72-cs-flexible-neck-utility-lighter_3251697

I took it apart, being careful not to blow myself up. I sanded off some of the black paint, drilled a hole in the caulking gun and attached it with a nut and bolt.

I found a sink hose at a thrift store. There was already a hole in the back of the caulking gun where I removed the plunger thingamajig, so I fed through a bolt and glued it into the end of the hose.

20171027_151430.jpg
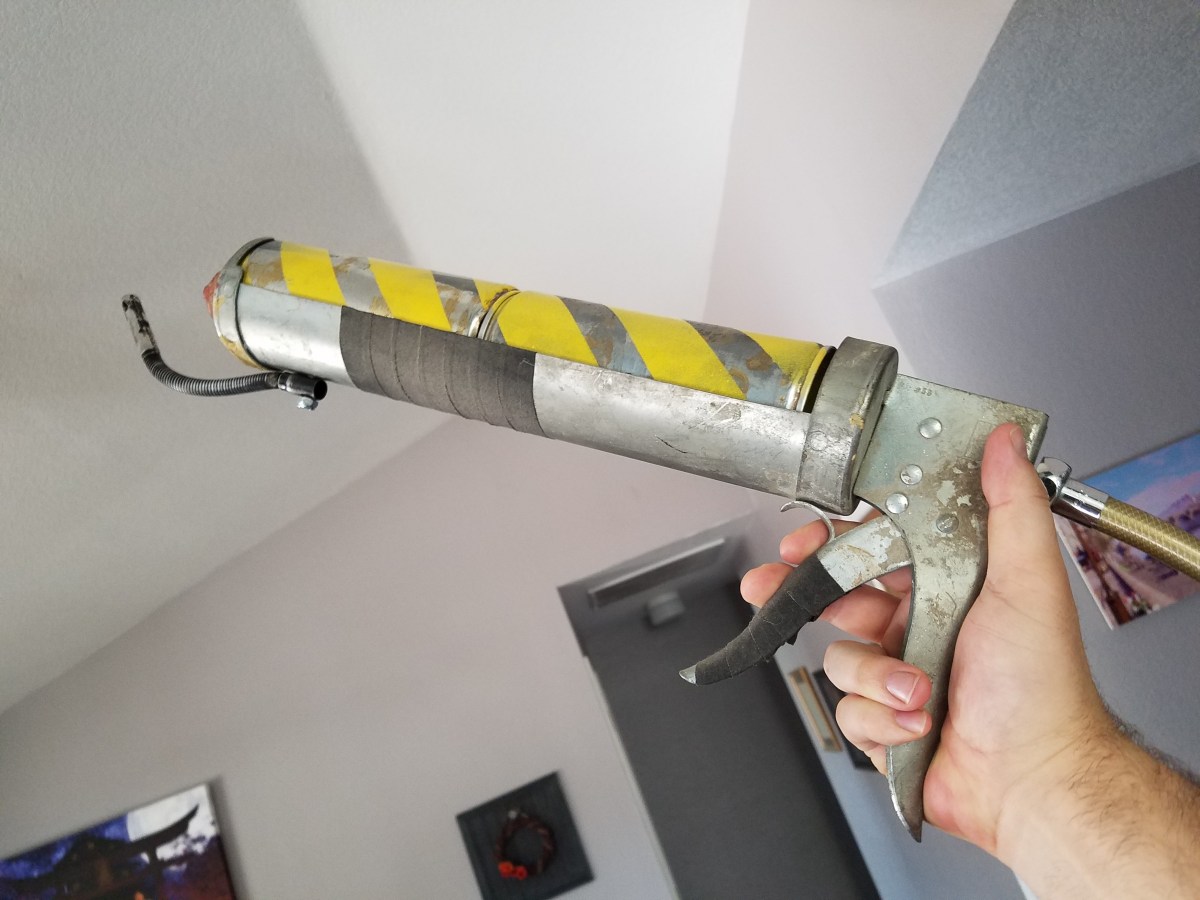
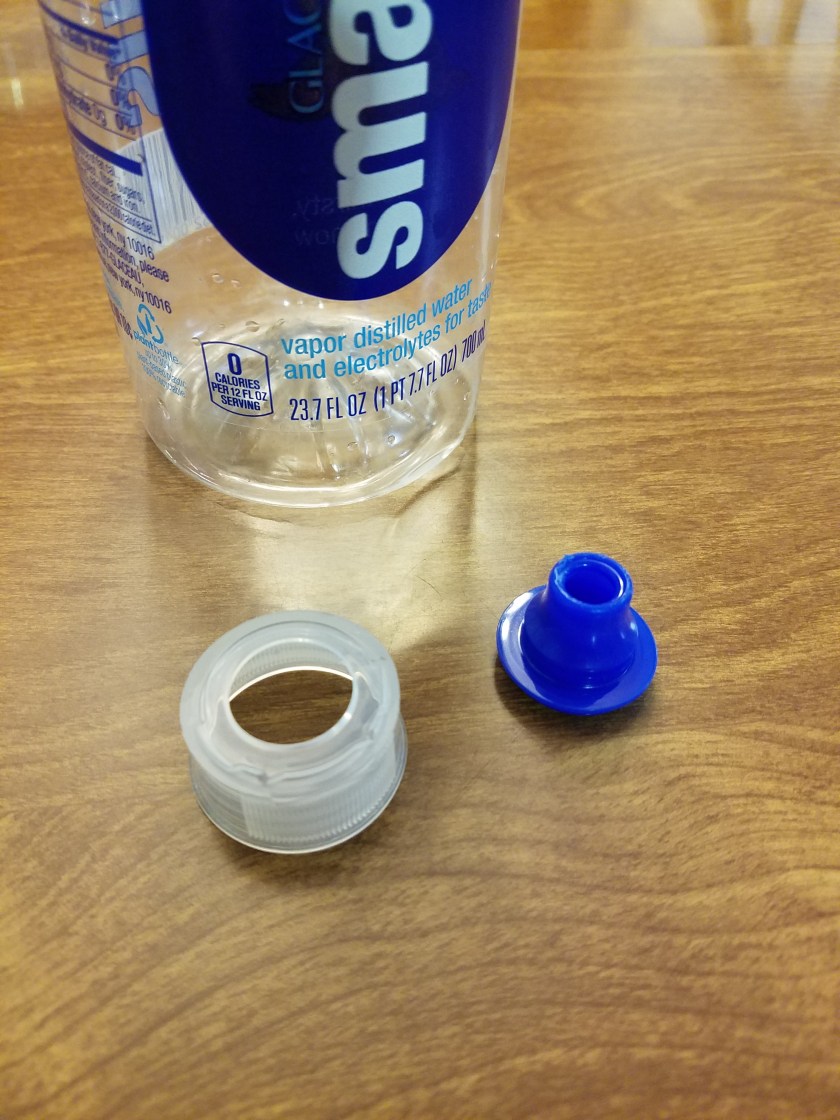
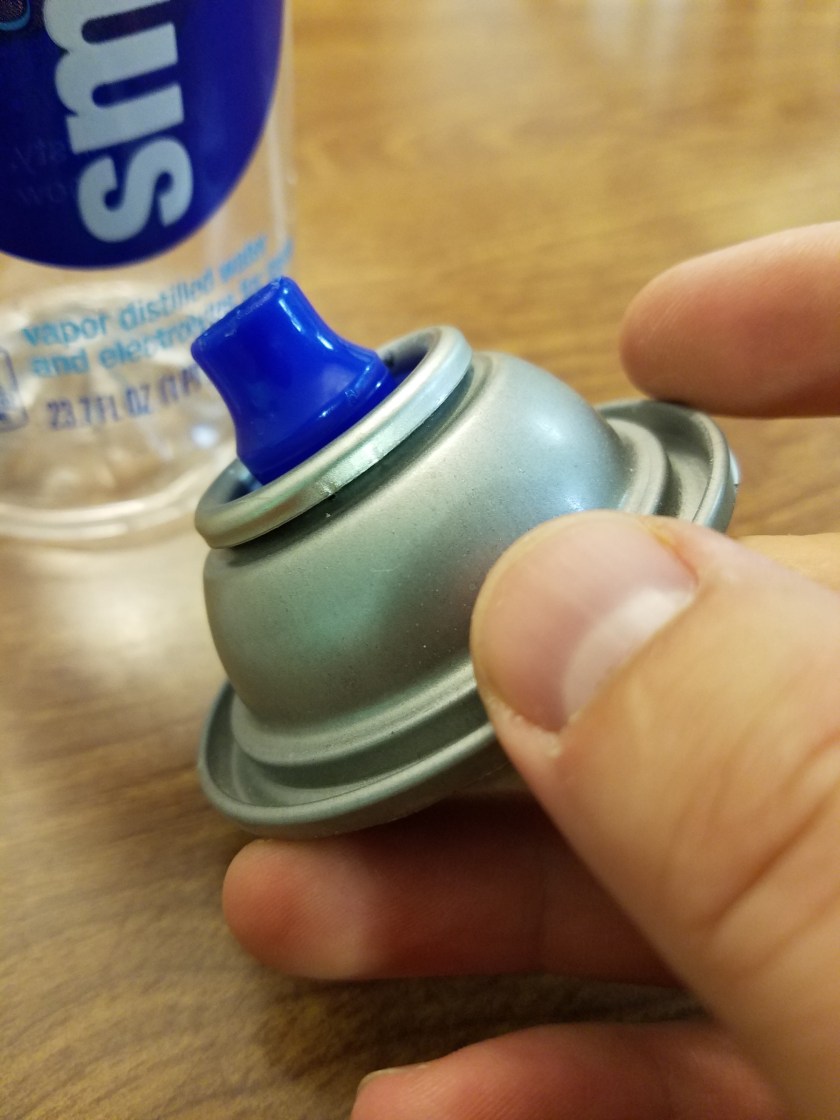
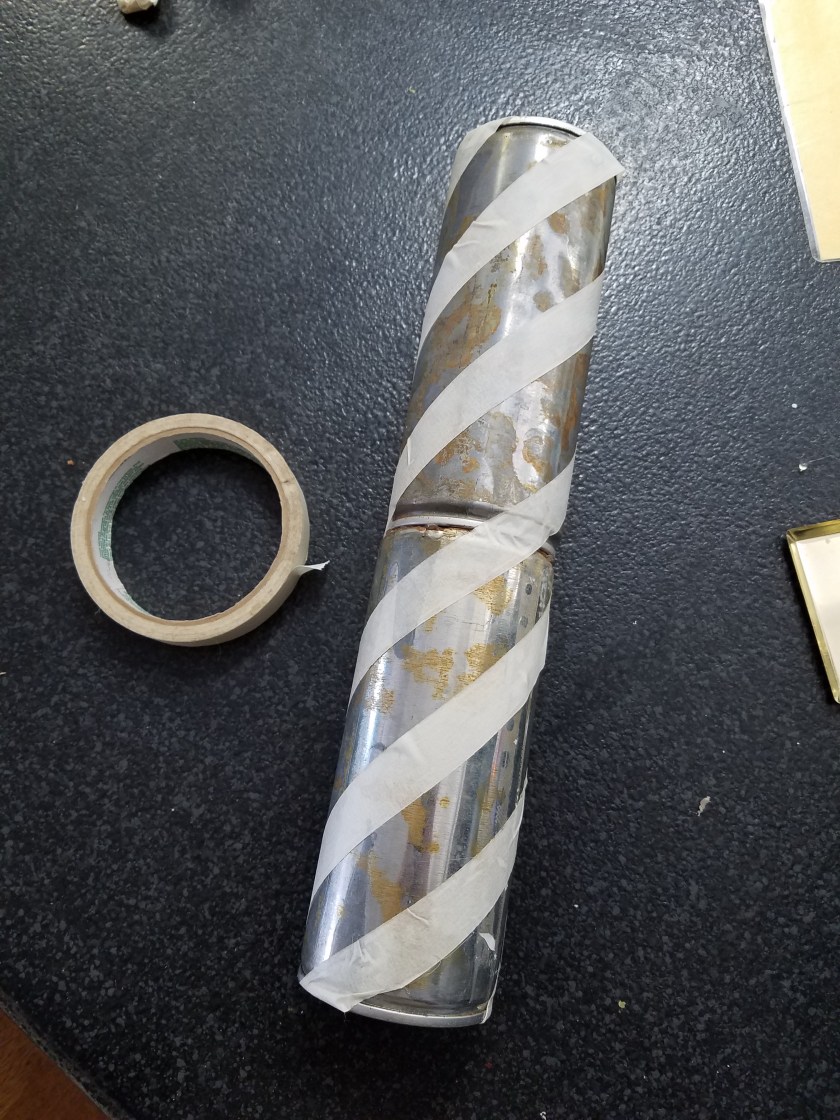
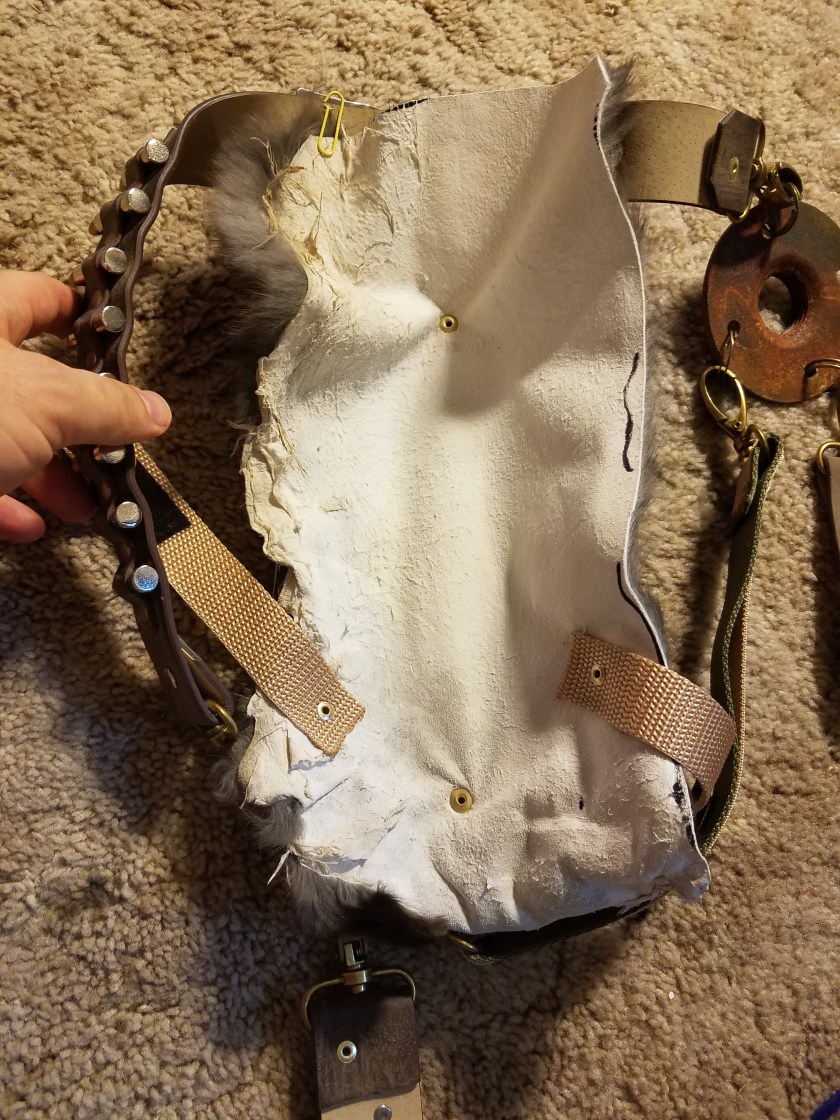
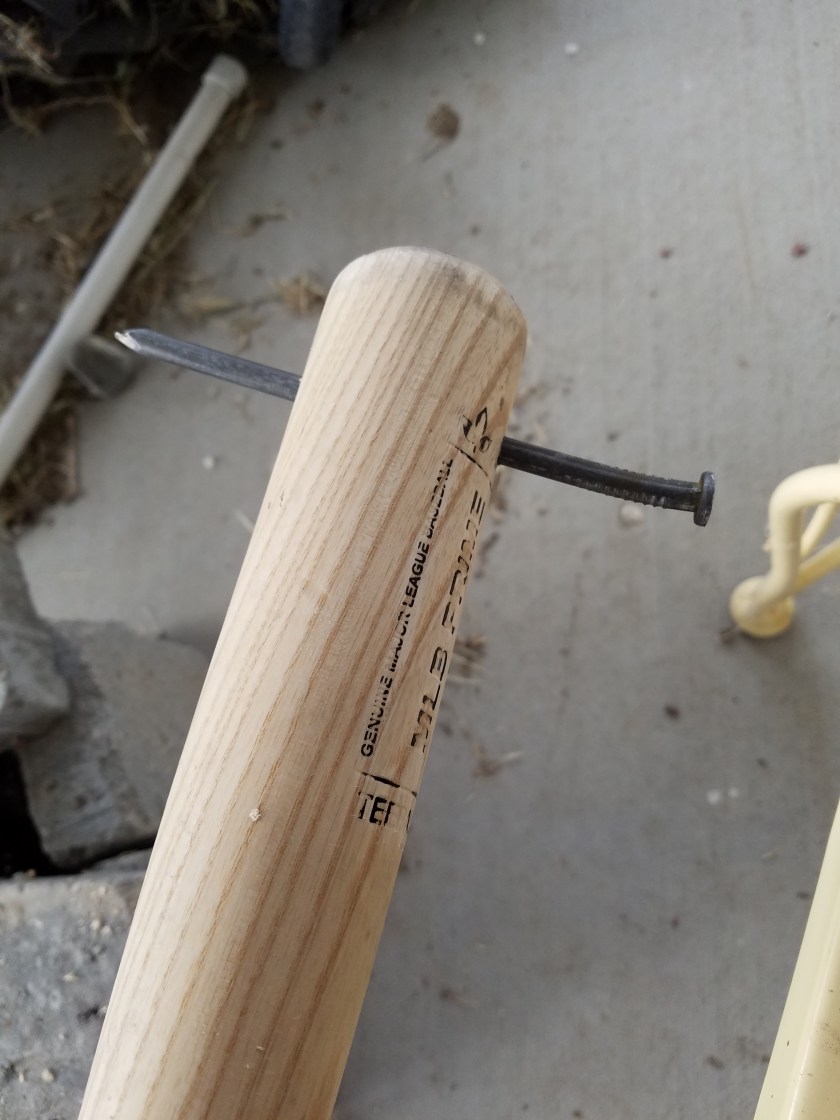
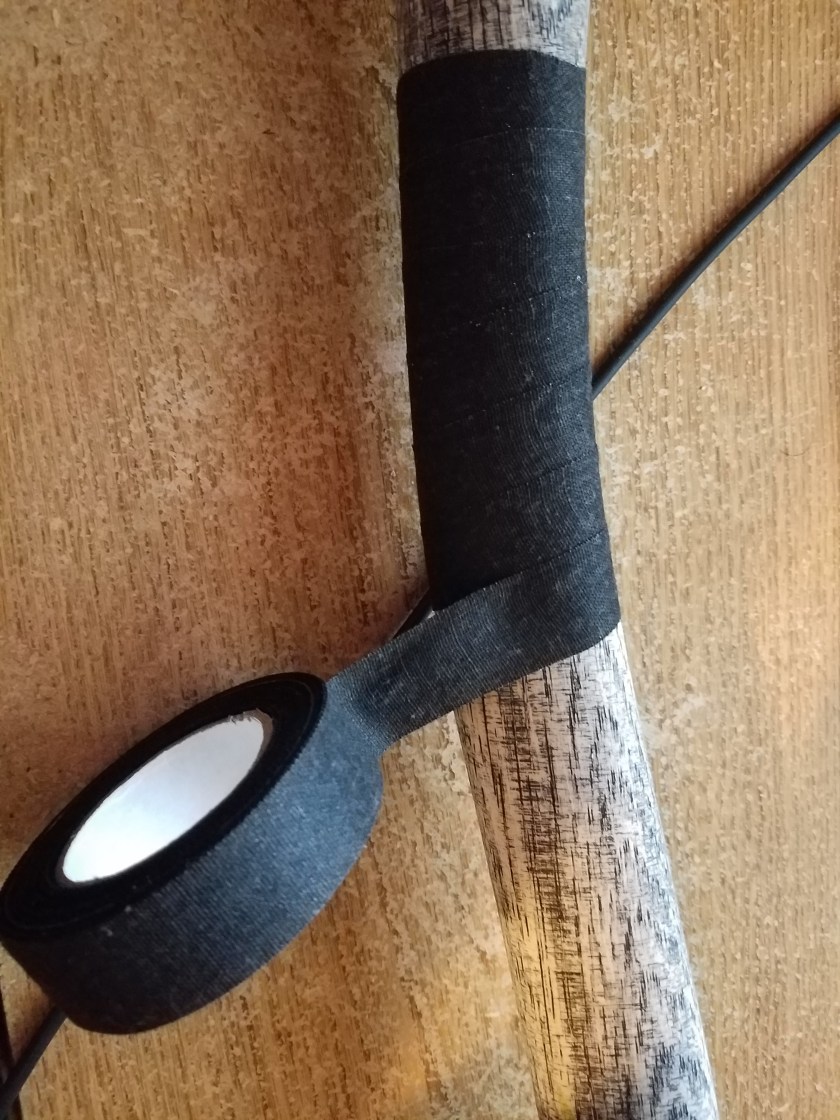
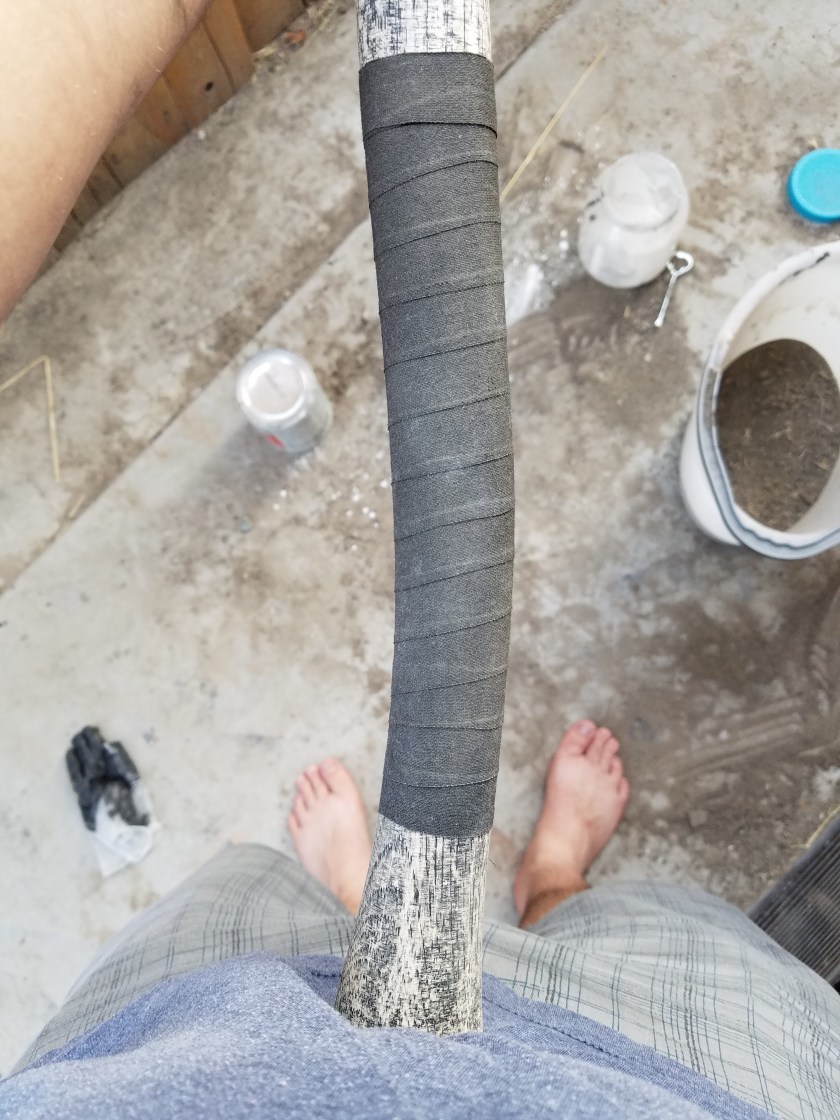
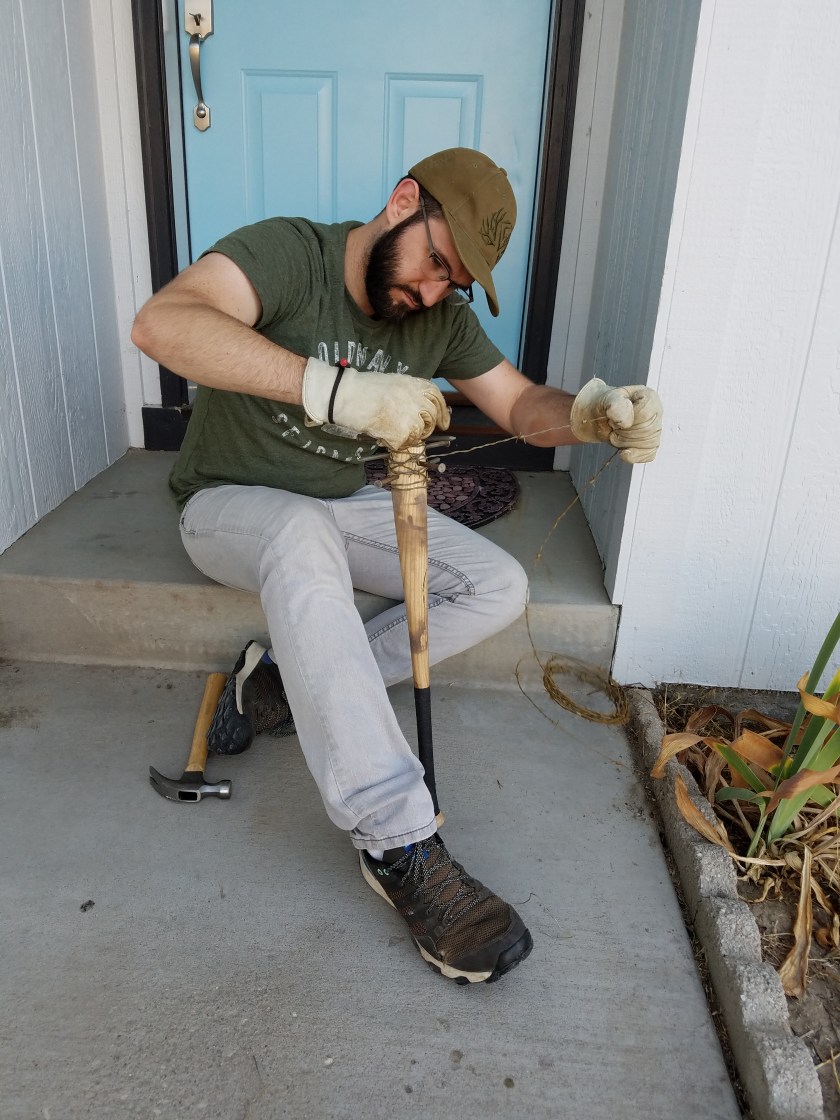
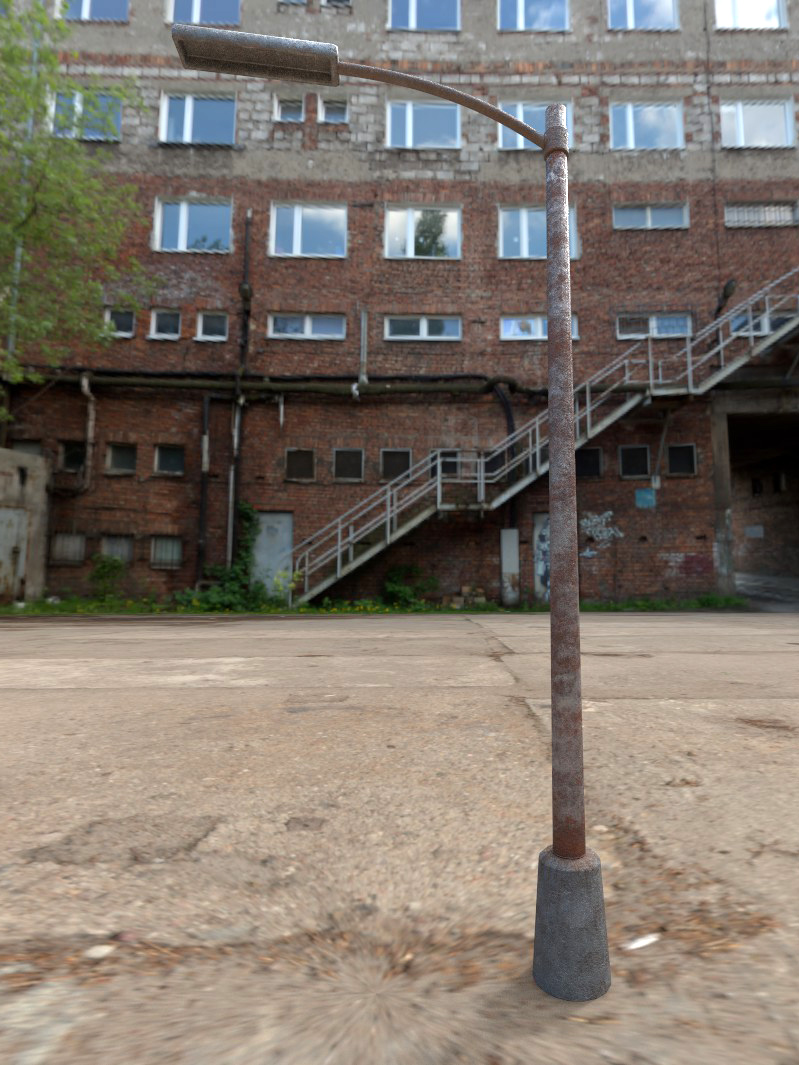
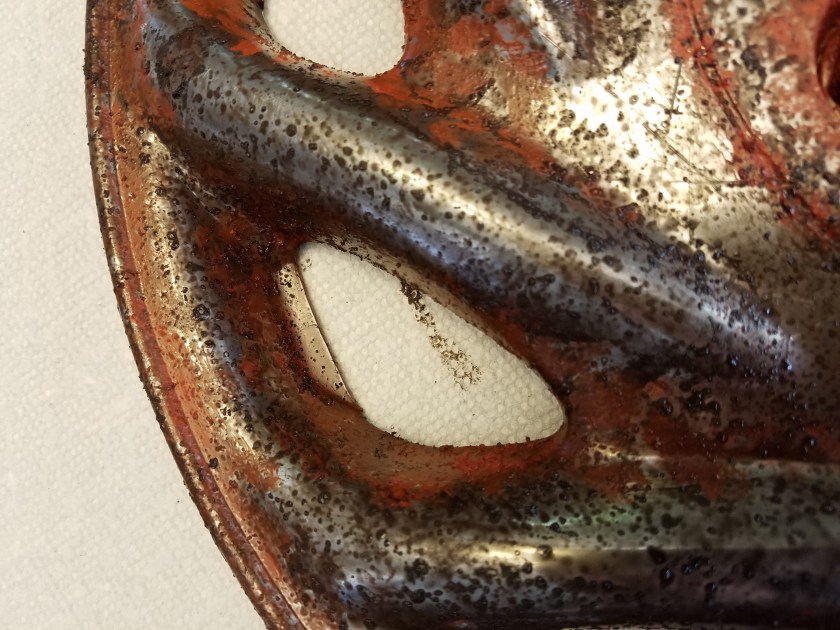
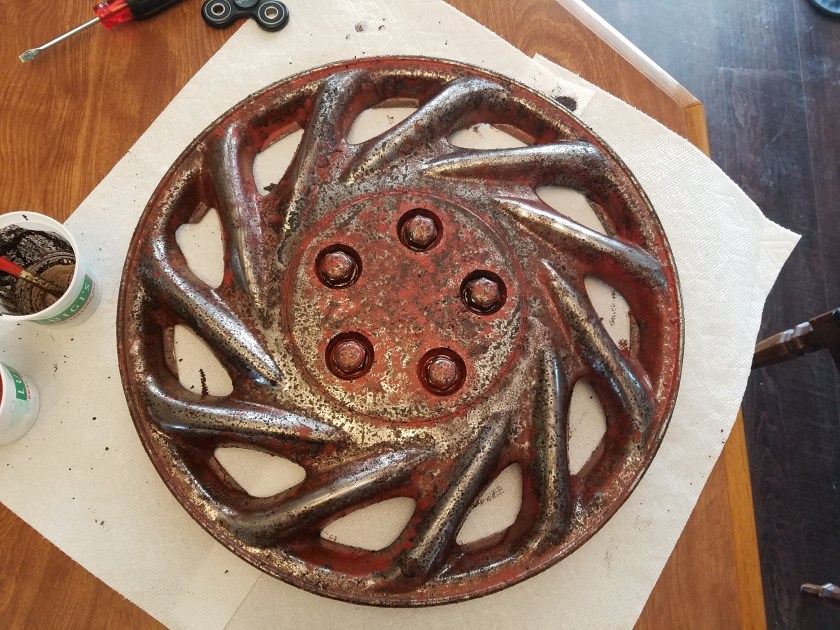
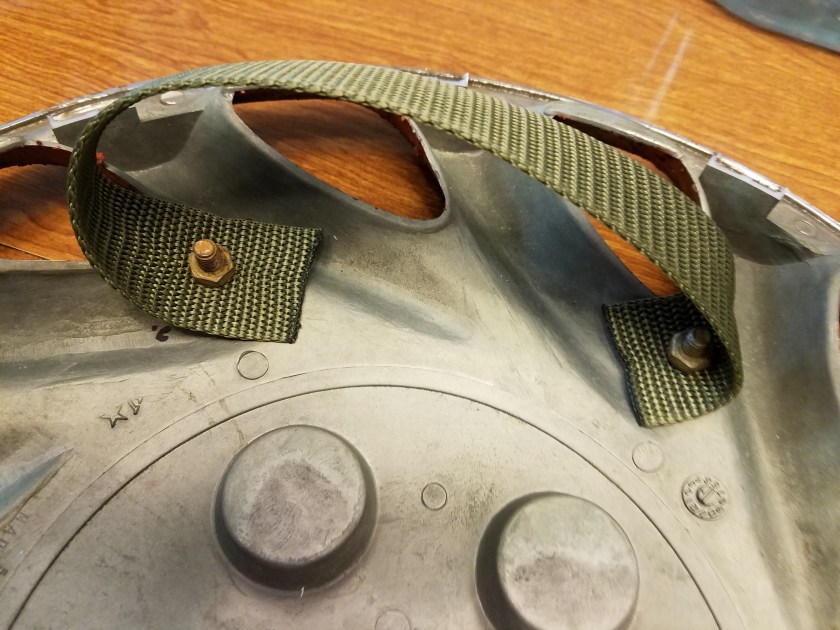
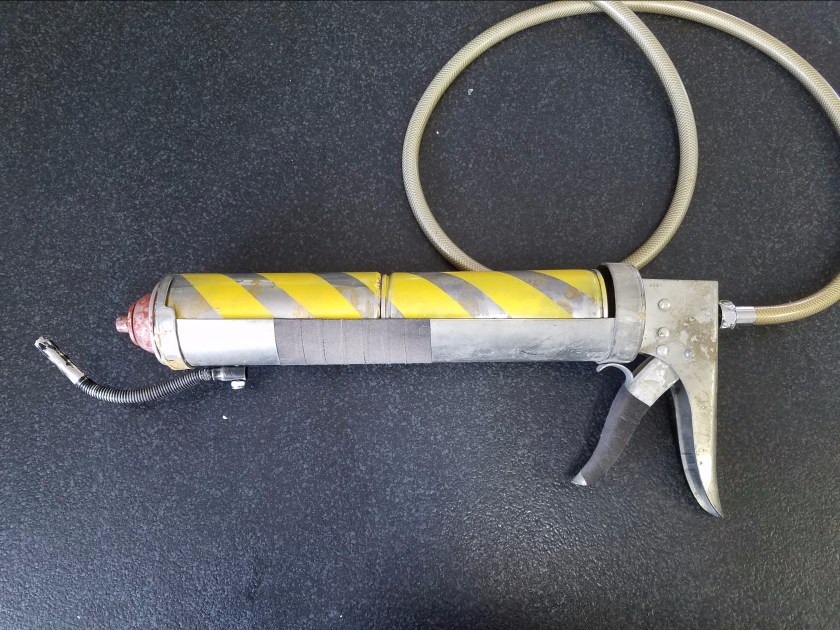
Final Touch was to add some grip tape to the trigger and fore grip, glue in the tanks and nozzle, and give the nozzle a bit of rusty paint, and give the whole thing a touch of dirt. Mutants beware.

Armor up

Greetings. Today I’ll show you how I made this piece. It’s a harness/pauldron. A pauldron is the technical term for shoulder armor. Let’s dig in.

Let’s start with the center piece. I don’t remember what it’s called, but it’s got threads in the middle to screw in a metal pipe. I picked it up at my local hardware store and rusted it up. You may remember it from my post on how to rust things. Attached to it are some key rings and brass clips that I got on Amazon.

20170803_231533.jpg

Next step was to attach some straps I had a faux ammo belt that seemed just right for this piece. I scuffed up the belt real good and rubbed some dirt on it. Then I cut off the end of it and attached it to the center piece with a rivet. You hammer them on and they don’t come off.

20170803_231803

Here you can see with the buckle attached. This strap will wrap around to my back where I have a large ring that all three straps will clip on to.

20170803_232822

Here’s a picture of the back, where you can see the 3 straps coming together.

20170817_215635

With the harness done, it’s time to armor up. In the post-apocalypse, easily workable metal is hard to come by. One good source is license plates. I feel like maybe I should blur out the licence plate numbers for some reason but… that sounds like a lot of work. Shout out to my bud Tommy for hooking me up. First step was to cut them in half.

20170810_212727.jpg

Since licence plates are made of aluminum, they don’t rust. Which will be great for the actual apocalypse, but it doesn’t look as cool for my costume. To make up for this I tried to beat them up real good. I took some sandpaper to them, and both ends of a hammer, I roughed them up and beat them into form. You will notice that one has a big gouge in it. I cut that bit out so that it would be able to bend enough to fit snug around my shoulder.

20170810_214732

Then I had to attach them. I attached a piece of belt with a rivet to the harness, and then attached the metal plates to that. That way it still moves freely. The top most plate I attached directly to the harness and you can see here.


20170810_223500

Now we hit it with some matte clear coat, and sprinkle on some dirt.

20171014_120018

To make it more comfortable, warmer, and more awesome, I cut out a piece of rabbit pelt and used rivets to attach it.

20171027_145427

And here we are. I will add some more dirt to some of the webbing and straps, but I’m pretty happy with how it turned out.

20171027_145301

The Digital Backdrop

So back to the computer. I’ve actually been spending more time on the computer than on costumes. I want to kinda walk through the progression of the background image for this year’s picture, and how it progressed from a concept through completion.

Without further adieu, feast your eyes upon this masterwork of draftsmanship and design. Behold the flowing lines. Marvel at the intricate detail. Feel the warm tones brighten your very soul.

Concept.jpg

Sorry, I was thinking of something else. This drawing is pretty crappy. BUT. It’s good enough. We see that we have a city street with a bust stop, a broken down car, a lamp post that is covered in vines, and the street is cracked and there is grass and trees taking advantage of said cracks. You will see that that stays pretty consistant throughout. And while the location remains the same, it does end up with quite a different feel than what I originally had in mind.

The “feel” in question I had originally though of as very similar to Fallout. Here’s a promotional image for Fallout 4:

Fusion x64 TIFF File

As you can see, the guys at Bethesda are really great at world building. There is tons of detail everywhere, lots of visual story telling, and the world looks very “lived in”. However, it’s all very…. brown. So as I was working on this, I remembered that I hate that about Fallout. It’s great at first, but after you’ve spent 50 hours exploring the wasteland, it starts to wear on you. And as this picture will eventually be hanging on my wall, I’d like something a little more pleasing to the eye. So I decided to go green. I’m so woke.

So with that in mind, here’s the first 3d blockout of the scene, complete with vegitation, including grass, trees, ivy, and ferns. Usually that would be something you add at the end, but since it’s so integral to the feel of the image, I put it in early. If you’ve been following along, you might notice the bus station and street lights I modeled in an earlier post. No textures yet, just getting a feel for the scene. The buildings are mostly just cubes, except for the one on the left, and the skyscrapers, which have a little more detail but are still just placeholder. But I’m liking where this is going.

BKGD1

Now we’ve fleshed things out a bit more. I’ve added some detail to the building on the left, in the form of some stairs and a doorway. I’ve added some ivy to the lamp post on the left. Playing around with the street some more. Still not happy with it. We’ve added a fire hydrant, a swing set and a climby dome thingy, some stop signs, fleshed out some of the buildings some more, added a brick texture to our apartment building. It’s coming along.

BKGD3

I textured another building, a added a different type of tree to the scene, textured some of the car. Added a skeleton to the passenger seat of the car. Things are looking good, but the ground is really still bothering me. The ground is literally half the image, and it’s the closest thing to the camera, so it’s gotta look good. I modeled some clovers, and I felt that was a step in the right direction. Then I was messing around with the texture on the closest chunk of street, and I liked it, but it wasn’t not enough. Something was still wrong.

BKGD 5

Luckily I figured it out. So I did some thinking, and I realized that for trees to grow that big in the middle of the street, it would have to be decades after the collapse. in that time, there would be tons of leaves built up with no one to get rid of them. With all that mulch turning into soil, you’d end up with a veritable forest floor. So that’s where I went with it. I looked at lots of reference of hardwood forests, and I came up with something that I’m really happy with. There’s leaves everywhere, clovers, and sarsaparilla, which is that leafy ground cover plant you see everywhere. Now we’re talking.

BKGD 6

I decided to go a little darker with the mood by making it overcast, and an angry looking sky. I set up a system that randomly generates the plants at render time. It looks better and is uses significantly less memory. Once I get the photos of us done, I may tweak a few things, depending on the composition turns out, but for now, I’m calling it done. Put a fork in it.BKGD13

Very Distressing

In the apocalypse, no one washes their clothes. They’ve got more important things to worry about. Like how to keep the zombie hoard from chewing on your face, or how to keep your 12″ mohawk up when there is no more gel.

Today we will learn a method of making clothes look super dirty and worn. You can also use this method to turn new jeans into old looking jeans, and then flip them for a huge profit, like Nordstroms

Today I did a pair of pants for Braxton, and a jacket for me. First step was to find a pair of pants, preferably cargo pants (you’ll need lots of pockets if you want to survive) at a thrift store, and I got the jacket from Wish. It’s a website/app where you can buy stuff directly from China. The upside is it’s super cheap. The downside is that it takes a long time to get here, the sizes are always off, and it’s never as good as it looks in the picture.Screenshot 2017-08-17 22.17.25

In the picture it looked like it was a canvas material. Turns out it’s really crappy polyester. It’s fine since it’s just for a costume, but if this were the real apocalypse… I shudder to think of my fate. Before I could do anything, I had to cut off these stupid cuffs. +10 points for effort, China, but I’m gonna call this one a fail.

20170807_200446

Anyways. First step is to rough them up. They will need nicks, cuts, etc. to sell it. I used the edge of a serrated pocket knife to get the job done.

20170807_191528

Spend extra time wearing the spots where it would naturally be worn, like down by the heels, on the knees, by the pockets, ect. Then I put in an actual cut so that I could so it up.

20170807_192958

The fact that my sewing is terrible really helps to sell the effect.

20170807_193555

Now that this is all sewn up, this boy is ready for the dirt. I repeated this with my jacket.

20170807_202930

The first step is to put on some gloves and dip my hands in black paint. Then I kida scrunch up the pants and get a little paint on there, gently so it doesn’t really build up. just a little here and there.

20170809_192744

Then- you know it- I rubbed some dirt on it. The dirt will stick to where the paint is. You can see that jar there with the white powder- that’s cocaine. But I also have another jar that is not picture that is diatomaceous earth. Any white powder will do. I sprinkle some of that here and there to give it some highlights.

20170809_192521_002

Once that is all done, I hit it with some matte clear coat, which helps trap the dirt in there, so it doesn’t just fly out when you dust off your pants.

20170809_194519

Here’s a before and after on these pants.

20170807_194324

Here’s some pants for me and for Raegan that I did.


So it’s a pretty cool technique, one that I can’t take credit for myself. I learned this one from Nuclear Snail, a really cool Youtube channel all about Post-Apoc costplay. Check it out.

Badland Beatdown

Sorry it’s been so long. I’ve been hard at work and taking lots of pictures, just haven’t found the time to get it on the blog. But here we go. Today I’m showing you how I made 2 mean looking melee weapons. Whether it’s zombies, terminators, raiders, or white supremacists (too soon?), you’ll be ready to dance when you’re rocking one of these.

20170817_194655 Edited

My first step was to acquire a wooden baseball bat and an axe handle. After checking every thrift store in town, and asking around on facebook and coming up short, I bit the bullet and had to buy them new. I spent around $30 for both of them, the bat from a Big 5, and the axe handle from Ace’s. Also acquired from Ace was the hardware I needed. Say “Hi”! I sanded his eyeballs so that they would rust better… We’re not on great terms at the moment…
20170808_221212

Next step was to sand off all that shine. Nothing is shiny after the apocalypse.

20170809_173816

For the axe handle, It wasn’t lacquered, so no need to sand, but I did want to make it look old. So what I did is I put on some rubber gloves, dipped my hands in some black paint, and rubbed it all over the bat. Then quickly before it dried I sprayed it off with the hose. The black paint stayed in the grains but washed off everywhere else. It was a pretty nice effect. I won’t tell you about how initially I thought I would paint it black, then immediately regretted it and tried to wash it off, and that the resulting effect was just a happy accident.

20170815_184004

While I was doing this, my hardware was rusting away in our vinegar, salt, and hydrogen peroxide solution.

20170809_081823

Next step for the bat was to drive the nails through the bat. They are much too big and would split the wood, so first I drilled holes. Then I hammered the nails in. I initially thought I would cut off the nail heads and sharpen them to match the other end, but I decided I like the look of it with the nail heads still on. It looks more barbaric. Remember: the mutants are no longer human. They show no sympathy and deserve none in return.

20170809_190028

Here I’ve finished driving all the nails. I was going to do 2 more, but I broke my drill bit. >_<   Not pictured here, but I then sprayed some matte clear coat on the bad, and then rubbed some dirt on it. The clear coat helps the dirt to stick, so it looks dirty. Because there’s a lot more dirt after the collapse. No more street sweepers, you see.

20170809_201242

Next step was to wrap them with grip tape. I got a roll of it on amazon. Goes on real easy, and really gives a nice grip.

20170815_190114

Then of course, I rubbed some dirt on it.

20170815_190400

Then I drilled a hole in the axe head, and attached the circular saw blades with a nut, bolt, and washers. The hole was a little small so I had to use a wrench to get the bolt in.

20170815_185429

Here I can be seen wrapping the bat in barbed wire. There was this kid out riding his bike and he kept riding back and forth in front of my house, sneaking glances at me. Can’t say I blame him. Neighbors probably think I’ve joined Antifa.

20170816_185305

So here’s a close up of the finished bat. I think I’ll call it… Lucille 2. That’s a double reference. If you get both, let me know in the comments and I will love you forever.

20170817_194715

And here’s a closeup of the finished buzzsaw axe. I don’t have a name for this one. Let me know if you think of something good.

20170817_194729

That’s if for this episode. It was a fun project, I’m happy with how they turned out. Cost me prolly $60 for all the parts, but that would have been a lot less if I had managed to find more parts used. But such is crafting. Let me know what you think. Don’t forget to subscribe or share or something. Make yourself useful.

20170817_194655

I model on the side…

Today I’m taking a break from costume creation to focus on digital content. Now some people don’t know this, but much of what you see in movies and TV these days, isn’t actually real. No seriously, it’s what we call CGI, or computer generated imagery. It only looks real.

For our backdrop this year, it’s looking like it will be primarily CGI, and I will be doing most of the modeling myself. How does one make a 3d model on a computer? Well, I’m glad you asked. There’s a few different ways to go about it, but for the bus stop I created today, I did what’s commonly called box modeling. As you will see, I literally start with just a box, and begin to tweak it, stretch it, and mold it into what I want it to be. You can start with a box, a cylinder, a sphere, a plane, or any number of primitive geometric shapes, but the principle is the same. Then you turn on your favorite Spotify playlist, get in the zone, and before you know it, it’s done! It’s just that easy folks. I modeled this bus station in 2 minutes and 15 seconds flat. Here’s the video to prove it. Thanks to my brother Matt for providing the music. I stole it off his Soundcloud. I’m sure he’s cool with it…

Kinda nifty, huh? What happens after you model it? Another astute question. I just so happen to have also modeled this street light. Spoler alert: It’s gonna be an urban scene. Here’s the street light in quesion:

StreeLightModeled

Pretty simple stuff. I just started with a bunch of cylinders for the base, the pole, the coupler and arm, and a box for the head. The next step is called UV layout, and it suuuuuuucks. Generally regarded as the most tedious and least fulfilling part of 3d modeling, but it must be done.

StreetLight_UV

Here I am in the UV editor. Laying out UVs is like skinning things. Like skinning a deer so you can stretch the pelt to make leather, it needs to be flat. In order to map textures onto any 3d model you have to skin it and lay it out flat. It’s all very tedious and boring, so I’ll just mention that the point of the checker pattern is a tool to make sure that the different sections are sized the same. Once that’s done, the fun can begin.

StreeLightLayers

The next part is texturing, which is the reward you get for suffering through the UV layout. I’m using a new program for me called Substance Painter. It lets you paint directly on the model using materials. So you can see in the Layers panel in the top right, I have a rough iron, rough rust, and fine rust, and I can use a paint brush to blend them together. It works very well. You can see on the concrete base where I painted in some rust streaks coming off the pillar.

StreetLight_Head

Here’s a view of the head of the streetlight. I’m adding some rust. Surprised?

StreeLightRender

Here’s a test render of the finished model. The environment is just for testing purposes, but it’s pretty close to what’s in my brain. Anyways, we’ll need to add some lights to this lamp post, but besides that, I think it’s done! Actually, now that I’m looking at it… I think it needs more rust….

Let’s get rusty

As I mentioned before, rust is a must. Depends on the world, but most post-apocalyptic settings take place decades or more after the collapse. In that time, most all metal will have rusted, so shiny new metal will look out of place. So we need to rust our metal.

20170722_092315
Here’s a collection of D rings, O rings, buckles and carabiners that I got on Amazon. The carabiners I was pretty sure were made of aluminum, and therefore wouldn’t rust, but I thought I would give it a shot just in case. Sure enough, aluminum.

20170722_092733

So for this job we will only need some household items: vinegar, hydrogen peroxide, and salt. There’s probably a more scientific measurement one should use, but I use roughly 2 parts vinegar to 1 part hydrogen peroxide, and just shake however much salt in there. Just pretend you are salting water to cook pasta.

20170722_142436

After an hour or so, the mixture has turned rust colored. You can just leave this overnight, but go for at least 5 or 6 hours.

20170722_142817

When that is done, sometimes that all that is required. But I find that if I want to turn it up a notch, I just use some plain old water. I add enough water to cover, and then set it outside in the sun and wait for the water to evaporate. When that’s done it should be even rustier. And you can repeat this as much as you like until you get the desired effect.

20170723_140241

So here they are all done. They look old, worn, and rusty, just the way we like them.

20170722_093039

These nuts and bolts turned out even better, probably because they have a higher iron content. One thing you can do when they are done is just hit them with a spray of matte clear coat. That will help the rust not rub off all over everything.

So there you have it. Pretty easy. It does take some time (at least 24 hours), but not the years it would take otherwise. Let me know if you liked this post/tutorial in the comments. Until next time.

The Shield of (rusty) Justice

In case you are unfamiliar with the genre known as Post-Apocalyptic, here’s the run down: Civilization has collapsed, and the few remaining humans must fight to survive by making armor and weapons out of whatever they can scavenge. Some common causes of the end of civilization (apocalypse) could be nuclear war/radiation, robot takeover, zombie outbreak, natural disaster, etc. Some examples of the post-apocalyptic genre would be Mad Max, Fallout, Water World, Terminator, and The Matrix. We have yet to determine the exact cause of the calamity in our story, but I do know that our armor will feature lots of car parts. Case in point is our first piece: The Hubcap Shield, perfect for fending off zombies, mutants, raiders, and viruses!

20170721_222441.jpg

The great thing about doing Post-Apocalyptic cosplay is that it’s cheap! Since everything is made from junk, it’s pretty affordable. One good place to find material are thrift stores. I visited one such local store the other day and came across this hubcap for $5.

20170720_171104

It looks new and shiny (except for the few scratches I put in it), but we want to make it look old and rusty. It’s all about the rust in Post-Apoc cosplay. The problem with this hubcap is that it’s not really metal, it’s made of plastic. I’ll show you how to really rust metal in another post, but for this piece, I used rust paint.

20170723_135851
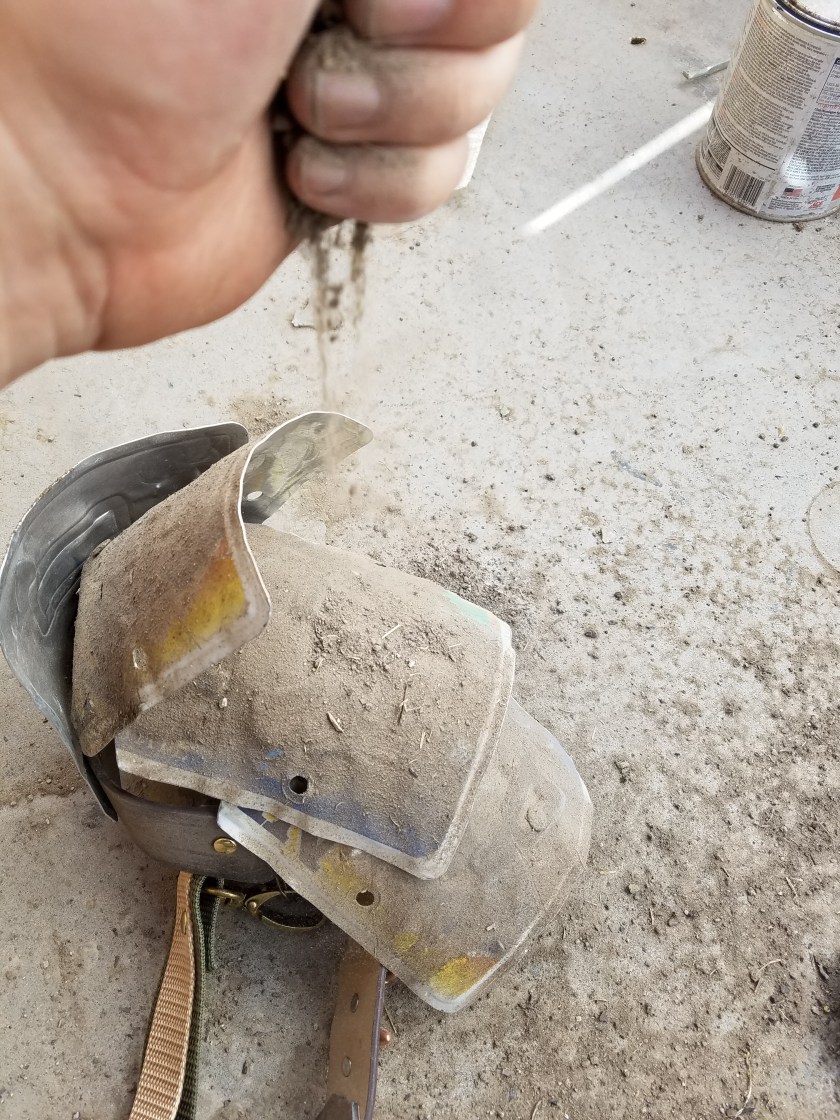
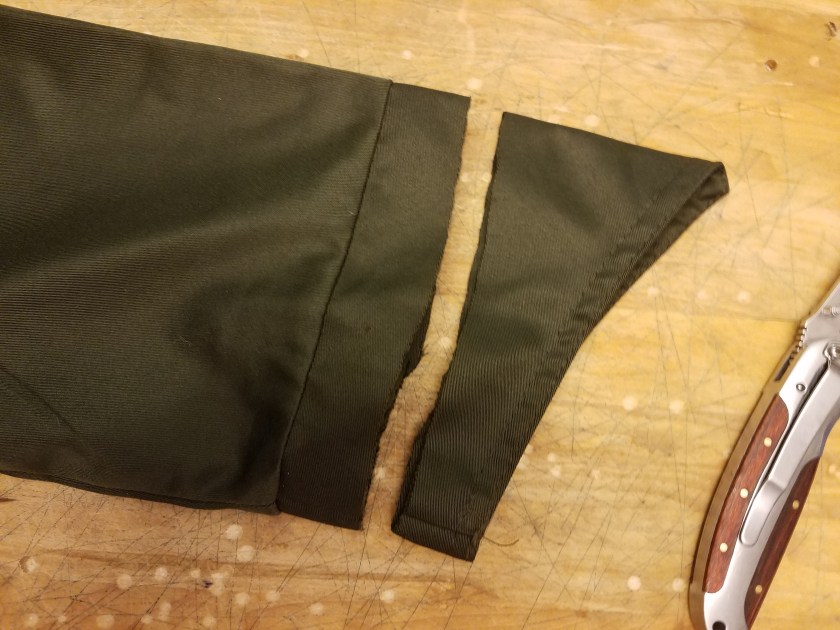
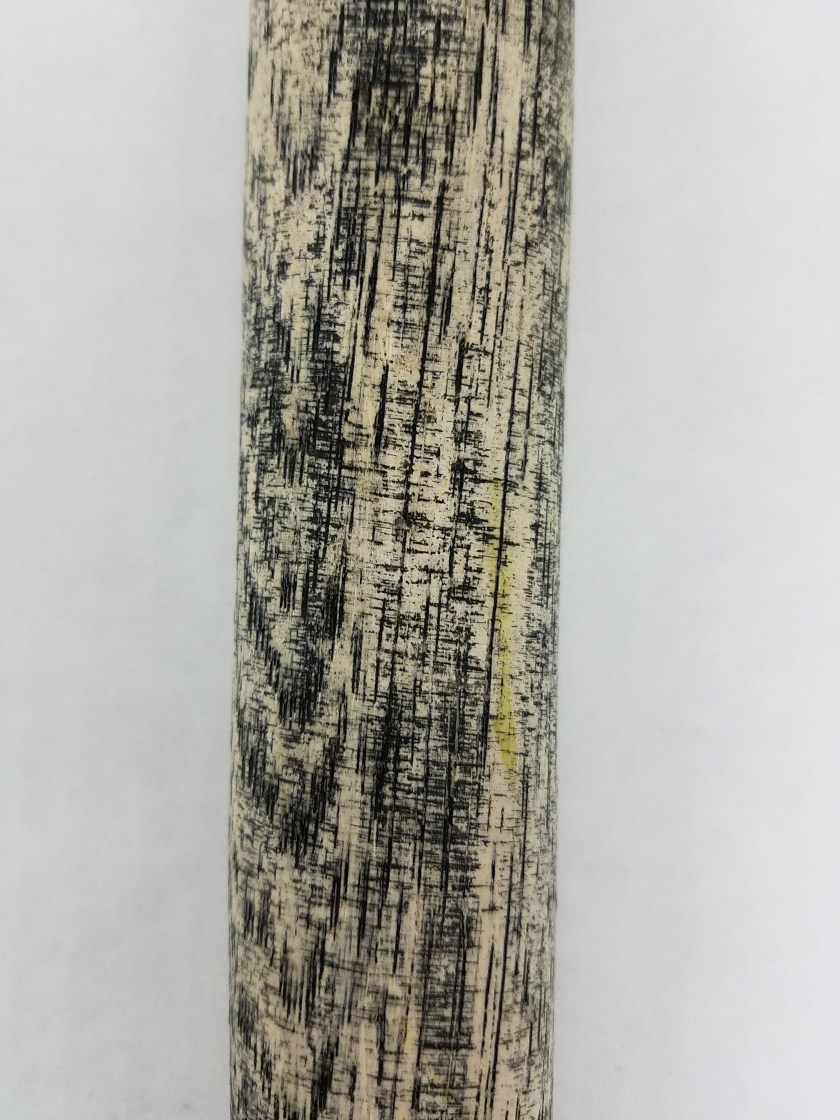
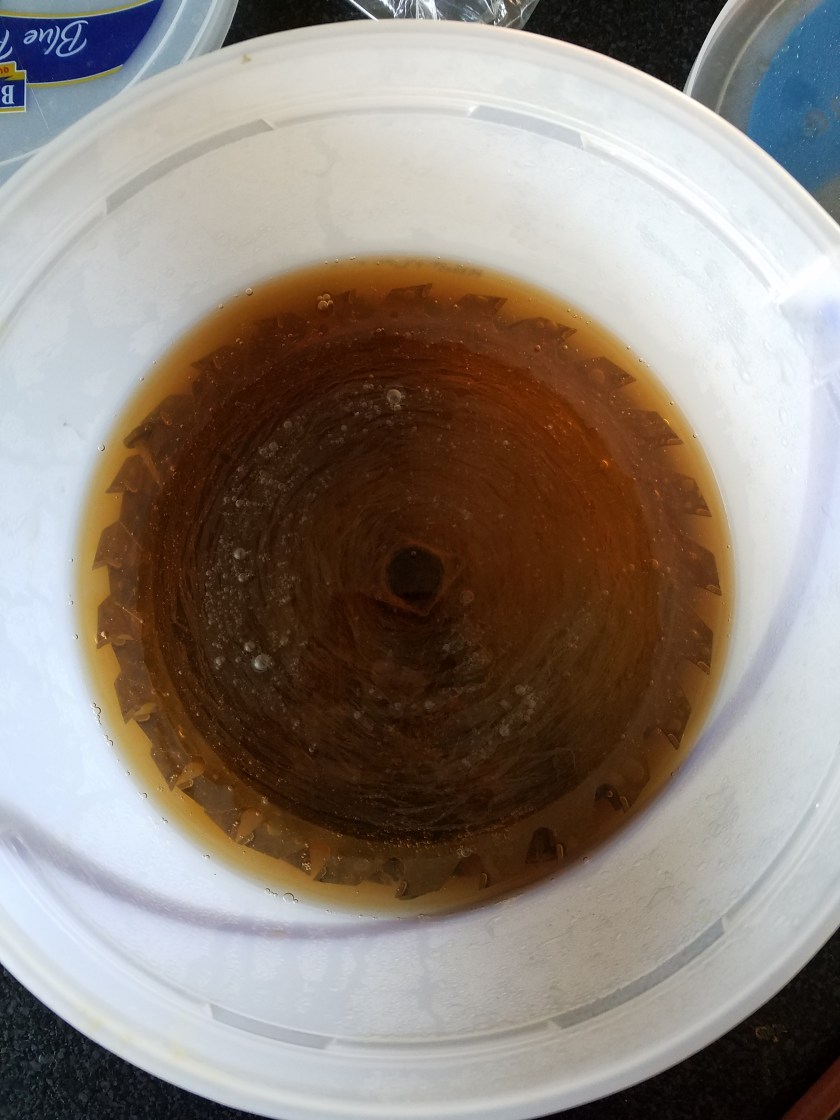
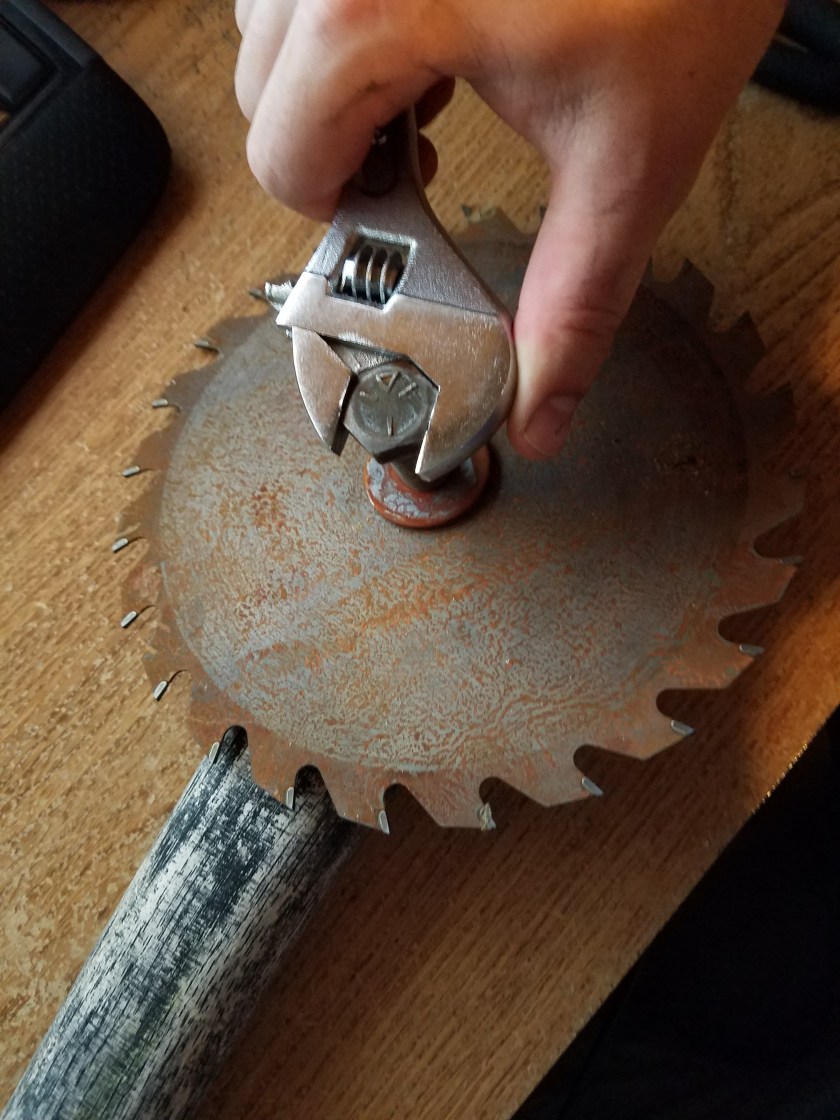
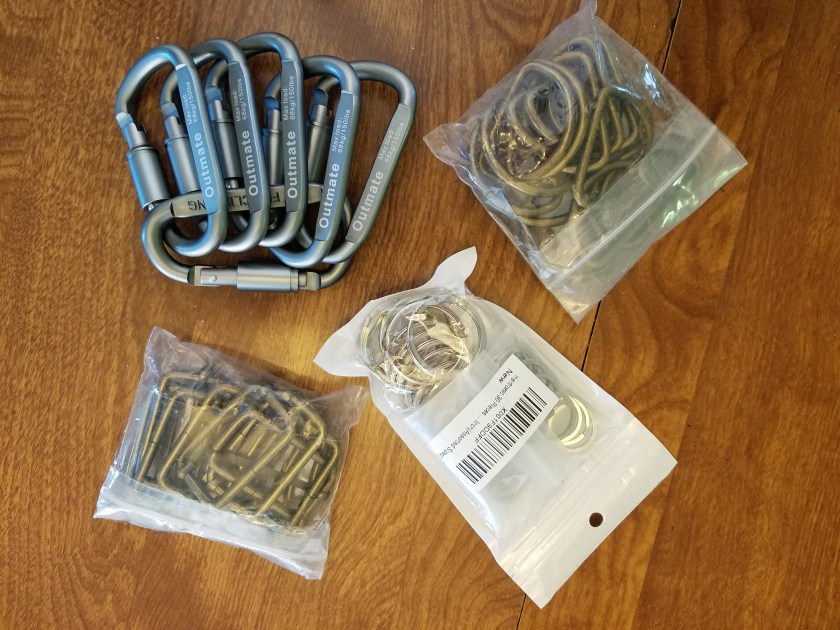
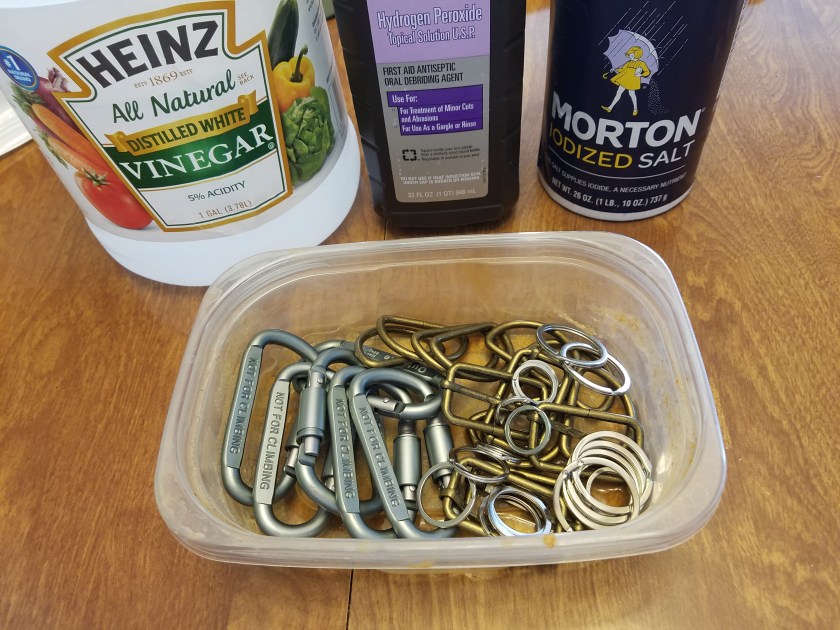
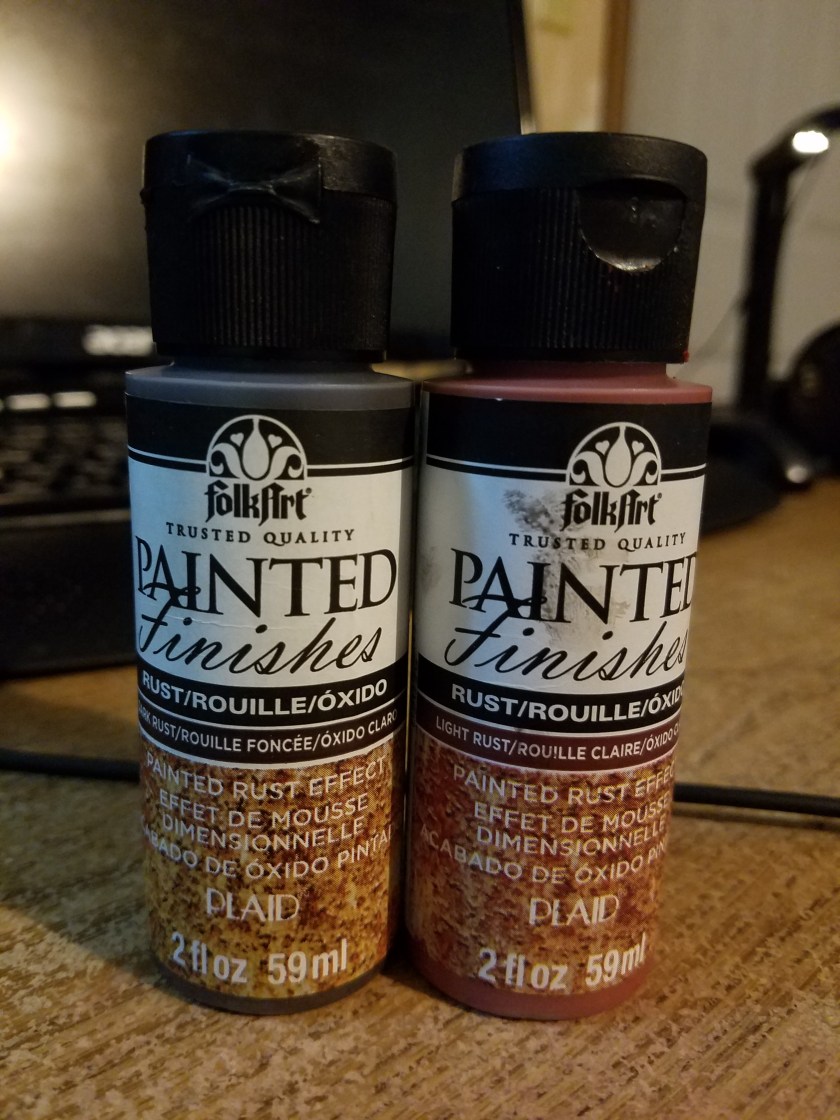
It was a cool 2 part paint set that I found at a craft store that worked really well. I’m no expert rust painter, this stuff just looks good.

20170720_181521

The paint came with 2 bottles, a dark rust that was really runny, and a lighter one that was really thick. By mixing the 2 together you can get streaks that look really nice, and they are both kinda grainy to give it some texture. Very nice effect.

20170720_181509

I tried to put more of the red rust in holes and crevices.

20170720_181456

Here it is finished painting. Now to make a shield out of it!

20170721_222207

I drilled some holes in it, and used some nylon webbing for straps, then used some rusty nuts and bolts to hold it in place. Pretty rudimentary, but that’s the point, isn’t it?

20170721_214106

I wanted to make some padding between my arm and the shield, so I cut out a piece of EVA foam (great stuff, that’s what all our scifi armor was made of) to fit. Then I wrapped it in a cut up old tshirt that I dirtied up real good and hot glued onto it.


20170721_222337

Here it is, all assembled. Captain America’s totes jelly. Vibranium? Player, please. We got rustoleum. I may end up rusting the back if I have time. But that’s it for now. Let me know what you think in the comments, and let me know what you’d like to see on the blog. My first time doing something like this, so any suggestions are welcome.

Introductions

This is the post excerpt.

Greetings and welcome to our blog! We are the Warren family, and here is where we will be chronicling the creation of our next epic family portrait. For the past 3 years, we have done some pretty awesome (if I do say so myself) themed family portraits. We craft our own costumes, create a digital background, do a photo shoot, and finally composite it all together in Photoshop.

So is this blog for you? To answer that, ask yourself these questions: Do you like cosplay? Are you into 3D/Digital art? Are you my mom? If you answered yes to any of these questions, you’re in the right place.

In the future I’ll be doing a blog post on each of these 3 portraits, including a breakdown of how they were created. But to establish our credentials, check out our previous work:
Warren Family Portrait 2014
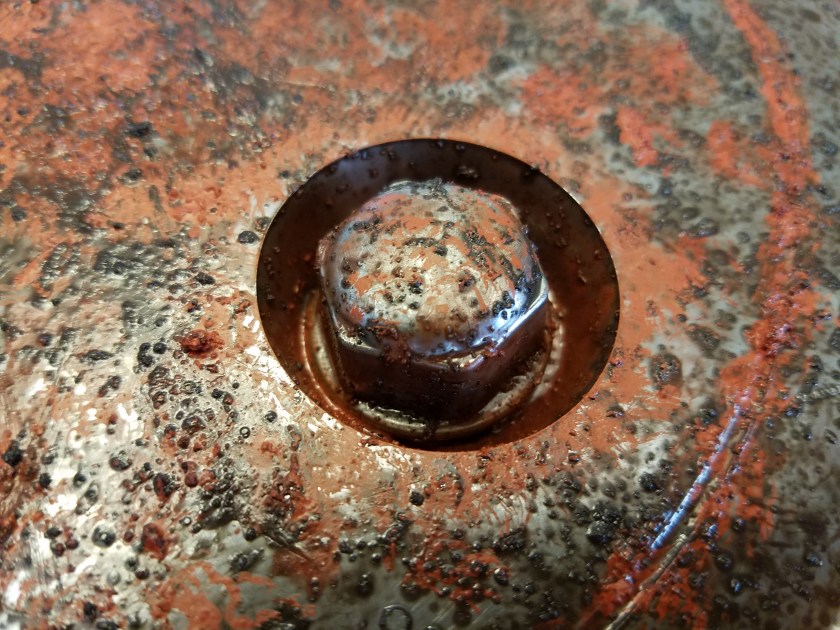
2014. The year of high fantasy. Dad (me) as the Warrior, Mom as the Rogue, Braxton as the Paladin, Ryder as the Black Mage, and Raegan as the White Mage. We guardians of the realm stand atop the fallen dragon. Our family motto blows in the breeze on our banner: Leo de Judah est robur nostrum. The Lion of Judah is our strength.


Warren Family Portrait 2015
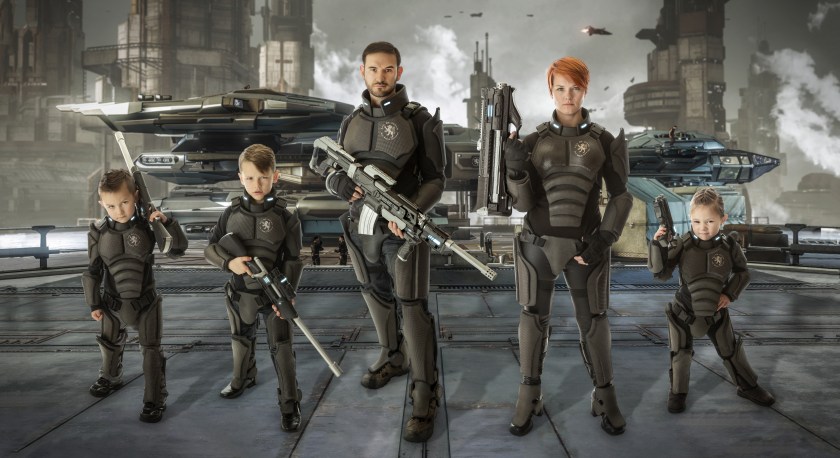
2015. My fellow nerds will notice the Robert’s Space Industries’ Constellation Andromeda in the background. We are a unit of elite space mercenaries. You see the looks on those kids faces? Best check yourself.


2016 Fam Pic
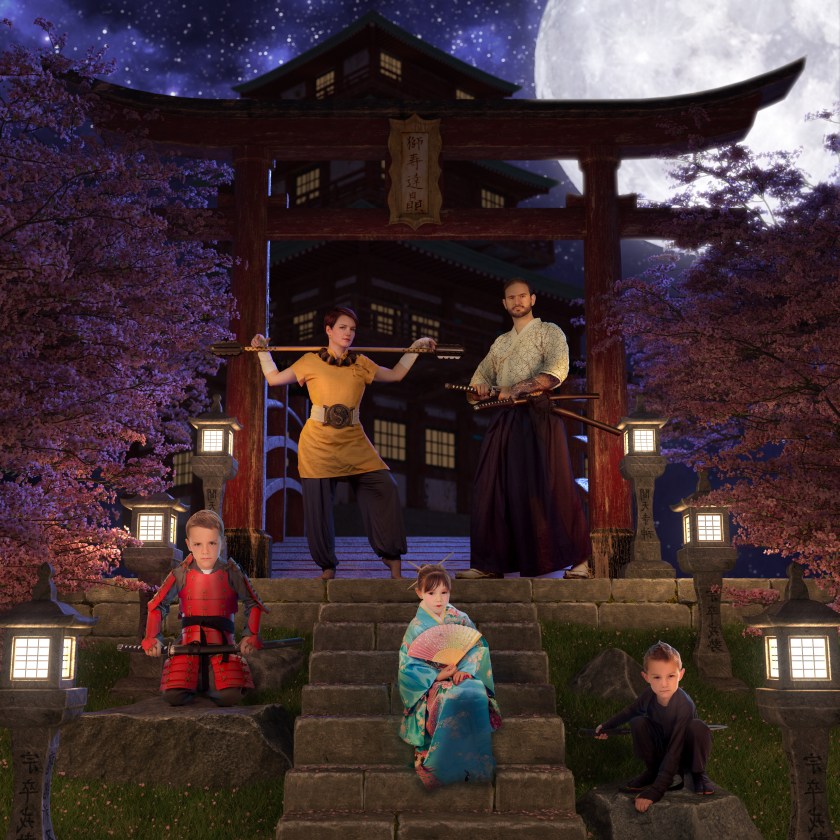
2016. Soguiiiiii!!!!!! Feudal Japan. Dad as the Samurai, Mom as the Monk, Braxton as the armored Samurai, Ryder as the Ninja, and Raegan as the Geisha. You’ve never seen 5 gaijin looking so bushido.

So now I think you will agree that these ain’t yo mamma’s family portraits. We now begin our 4th masterpiece. This year the theme is POST-APOCALYPTIC!!! Stay tuned for the making of my first piece, the hubcap shield.